QT9 QMS Power User Settings: Customizing Workflows, Fields & Notifications
March 14th, 2025
Full Webinar Transcript
Good morning, everybody. We are going to go ahead and get started here. We are at the top of the hour. So welcome to the QT9 QMS webinar on global admin or power users. All right. So during today's session, we are going to focus on the access that global admins have and how they can impact inside of the system.
Now, before we get too far into the webinar itself, I do want to go over some of the webinar tools that are available to you. Now, if you do look on the GoToWebinar screen, you will see an orange arrow on the vertical webinar toolbar. Now that's either going to expand or collapse your toolbar view. Now at the bottom, there is a questions area, so you can submit questions you have during the webinar. We do have our staff available here to answer questions as you need.
All right, so don't be shy about asking anything if there is anything we can help with.
Now, other than those basic webinar tools, I wanted to talk a little bit about the webinar series that we do. So these webinars are designed to provide our users with features, functions, and tips about using the QT9 QMS. Now we're going to have users from obviously all of our clients here that are going to have a very wide range of experience. All right, so during today's session, we do want to stay focused on the specified topics that we're discussing.
⁓ for the QA and everything. So we do want to stay focused on global admins. Now, if you do have any additional questions, of course, you can schedule a one-on-one with your implementation and training specialist. Or if you aren't directly assigned an implementation and training specialist, you can always reach out to support at Qt9software.com and they can get you in contact with somebody from our training team to help you with any questions that you may have.
All right, so we do want to talk a little bit about global admin user rights. All right. Now, a global admin user, they have total access to the QT9 QMS system. All right, so they can be assigned as a responsible party for any record, they can approve for any record regardless of site, they can reopen closed records, and they can also delete specific records.
All right, so these are really key functions because a global admin appears throughout the entire system. Now, only a global admin can create another global admin as well. So these are things that we're going to kind of touch on today, too. ⁓ global admins do have something specific. They have access to the global menu, which dictates the settings for every site under your URL.
All right. And the global admins also have full access to the manage maintain menu. So they are going to be able to actually build out the drop downs for each and every one of your modules as well.
All right, pretty key elements. So we're going to kind of touch on these today and I'm going to show you the practical application of how those operate. All right. Now, one other thing I do want to point out before we really dive into it is that we do have a lot here as far as learning about the capabilities of the QT9 QMS. So if you do have anything that or if you need to expand on what you guys have, you can always reach out to qt9software.com.
You can always reach out to sales at qt nine software.com or our number is listed here as well. So we are here to help you guys, ⁓ both you know, before, after, and always.
Alright, so let's get into the actual global user settings and what globals can do. All right, so here on the main site, a global admin can do just about anything. All right, now I'm gonna go through the global menu first and we're gonna talk about the what is actually available here. So if we look under the global area, this gives us access to a few really key elements. Specifically the settings, the site administration.
And the tools. All right, we're going to talk about the other locations here in a minute, but the first thing that I really want to focus on here is site admin. All right, so a global admin is the only one that has the ability to add sites to your QMS. All right, so in here you can see all of the active sites. You have the ability to manage those sites simply by clicking into it.
And in here, of course, you can change the name of the site, the site code. You've got the ability here to dictate an address, ⁓ quality policy, quality objectives, the message board, and of course you can see some of the items here on record numbering.
All right, but the key element here with the site admin is that you have the ability here to add new sites and edit existing site information.
All right, so this is a very, very key part.
All right, now the other big thing that you have here is access to the global setting menu. Now, as I mentioned with global settings, we get to dictate essentially how certain elements of the system behave. All right, so let's start with talking about some of the more basic system settings that you've got access to. Now, you do have the ability here to set a quality policy or quality objectives.
And you do have the ability to decide if you want those for across your entire enterprise, or if you want each site to have its own quality policy and quality objectives. All right, so if you are a single site, it makes sense to set everything up here. If you are multi-site and those sites have different quality policy and objectives, of course, you can divvy this out by site as needed.
All right, the other thing that we can do that with here is the message board. So of course you can do message board by site. All right, so here this is where you can add basic information in.
All right, so these are available on the home screen. So just to point out here, if I was to go back to the main page, you'll see all of that information listed down here with your quality policy, your quality objectives, and your message board.
All right, so those are some of the more basic global settings. The other big global setting that you've got access to, of course, is the ability to edit your logo. So in our case here, we just have a generic one, but if you needed to update your logo, you certainly can. All right, so at minimum here, do remember that you have size, you have these size restrictions and the format restrictions right here. So the file can be no larger than 200 by 75 pixels and
It has to be either a PNG, a GIF, or JPEG. All right. Now, the reason this logo is so important is that not only does it appear at the top of the screen with your branding, it also is going to ⁓ show up on your reports. So when you put print a report from the system, that logo is going to be there. So obviously it's important to make sure that your branding is on there.
Alright, so as I said, those are some of the more generic global settings. All right, now there are more specific global settings under the alerts and under the approvals in miscellaneous. So let's look at the alerts first. All right, now under the alert area, you can note you notice that we do have alerts for a lot or a lot of the different modules that are available here. Now I'm gonna start under daily notifications here because I do want to press
kind of impress here that for a global admin, you get to decide the frequency of daily notifications. Now these are the emails that you get from us typically in the morning and it contains what people have outstanding inside of the system. Now the reason that this is so important is that this also ties into something that we're going to talk about, which is tickle time. All right, because when you indicate anything that has a tickle time,
You're saying it's going to show up under this daily notification email. So if they're only getting a daily notification email once a week, you may need to push out your tickle time. So that way people are getting more notification. All right, but ultimately you get to decide your notification occurrence here. So we're set for Monday through Friday on our demo site here. But you do have the ability to say if you wanted Monday, Wednesday, Friday, you can do that as well.
All right, but ultimately this is up to your discretion.
All right, now under here, one of the other key elements I want to show you here is under the user tab. Because one of the things that global admins get to decide is how often your passwords expire. Now, of course, most of you have IT policies in place. So you need to ensure that your password expiration time likely matches up with that. So you can do that here. Now, if this is set to zero, this means that passwords will not expire.
All right, so this is a very important area for you to keep in mind. Now there are other elements to the alerts as well. So let's talk a little bit about you know ISO actions. All right, so in our system, ISO actions is kind of condensing corrective actions, non-conforming products, and preventative actions together. Now, in here, you get to define the tickle time specifically for the verification phase for a corrective action.
And for a preventative action. So in this case, it's 14 days for a corrective action and 10 days for a preventative action. Now remember, when we talk about tickle days or tickle time, this many days before the due date, this is when it's going to start showing up in that daily notification email that you receive. All right, so this is a very, very important thing to make sure that you have set correctly.
All right, so of course that's going to give you the capability here to specify that information or to specify when this appears in that daily notifications. So this is how much warning somebody has that they have something coming due. Now, whether we're talking about ISO actions, whether we're talking about ⁓ deviations here.
Document control, maintenance. So as you can see here, we have a lot of different tickle times that you can impact. And in in addition to that, some of these also have other items that you can populate. Document control is a great example. All right, because not only can we set tickle time, we can also start discussing other things like alerting affected departments about new documents, default document review frequency.
or even deciding do I want a default document review frequency or do I want to enable document review by document type. So as you can see in the alerts, it is primarily determining how often you want people notified. But also there are some other things in there based on each individual module.
All right, so this is an area as a global admin that you need to familiarize yourself with.
All right, so in addition to just the alerts, one of the other really key elements is the approval and miscellaneous area.
Now, I say that because the approval of miscellaneous, there are some general settings here that we need to talk about. But in this area, we also get to define for most of our modules how many approvers are actually required. All right, so these are very, very important areas. Now, one of the some of the general settings that you do want to keep in mind as a global admin are some of the elements like your inactivity lockout.
All right. So a lot of people don't really understand what this inactivity lockout is. Now, as a global admin, you get to make that decision on if you want this turned on. And you need to understand what this actually does. All right. So the global or the inactivity lockout does not kick somebody out after you set a set time frame here. All right. Your inactivity lockout is more of a security measure, more than a license management measure.
Now, what I mean by that is if I add or if I put any number in here and I save this, that means that if the system s or if the page sits inactive for this amount of time, the system is going to lock you out. Now that does not mean that it kicks you out and releases the license. What it means is that you need to reenter your password to continue moving forward. All right. So as I said, this is more of a security measure, more than a license management measure.
Now, one other element that you need to be mindful of in this area is your default offset. All right, default offset actually accounts for your time zone. Now, with that being said, we just had a time change happen this past Sunday. So, of course, if you haven't updated this default offset information, you will need to. Now, if you're unsure of what your default offset information is for your time zone.
Of course, you can reach out to support at qt9software.com and they can provide that information for you. But this is the offset from UTC. So of course, this is how you decide or indicate the correct time zone for your system. The other reason that's so important as well is that is also going to make sure that your timestamps are correct on any of your timelines in the system.
All right. Now, one other element that you have the ability to use here is your site groups. All right. Now, site groups tend to only get used by a lot of our larger clients. Now, the what this allows you to do is if your site groups is turned on, all right, this really allows you the capability to group your sites by whatever grouping that you need. So let's assume that you're a multinational company.
So maybe we have five sites in India, we have five sites in China, five sites in Mexico, and five sites in the United States. I can, if my site groups are turned on, I can build site groups based on that location. So we would know the China group, the India group, the Mexico group, or the United States group. All right, so using site groups is really handy. But if this is checked for use site groups, that is what's going to open up under the global menu.
your site group administration. All right. So under here as a global admin, you can kind of see how we've done this. All right. So we've broken ours down by converting fulfillment. So we can kind of see how this is broken down.
All right, very, very helpful tool. All right, and that is only at accessible if the site groups is turned on.
Now, there are some other really important settings that are decided here at the global level. All right, specifically being able to add records in form. Now, this is also really important because if you are a client that really needs to restrict who has access to edit your customers, your products, or your suppliers, then this is an area that you need to be aware of. So I can summarize this very quickly. If these are checked.
For each one of these boxes down here. What this means is that this is restricting who has the ability to create new customers, new products, and new suppliers on the fly. Now, what I mean by on the fly is like inside of a corrective action. So let me demonstrate here. I'm gonna grab one of my existing corrective actions here.
Now you'll see I have the ability here to create a new customer or a new supplier. I also have the ability under the material info area to add a new product. All right. Now the reason it's allowing me to see those is because I am a global admin user. But what this setting is saying is that at minimum, somebody needs to have customer permissions, product permissions, and supplier permissions, as well as ISO action permissions.
to be able to add somebody on the fly. All right. So by having these checked, you're restricting who has that access. And you get to make and that helps you keep a tighter handle on those lists. All right. So these are very, very helpful tools for you guys to know that you have.
Now, one other key element here for the approval miscellaneous area is actually all the way over here on the right under the passwords.
Now, your passwords, this is really key because there's one main setting in here besides all the password strength information. All right, so first and foremost is this approval. So if this is checked, we are requiring password for approval. So if you are a customer that deals with the FDA, or if you are dealing with 21 CFR Part 11 compliance, this is a setting that you want to have turned on.
Because this is what's going to require you to enter your password when you do any form of an approval. All right, so if that is checked, it's going to make you put in that password as your electronic signature. So again, if you're dealing with 13485 or the FDA, this is a setting that you want turned on. And this is where it's located at is under the global settings, approvals, passwords, and require password for approval.
Now, additionally, there are some other areas in here that you want to be aware of for the passwords. So you can define your minimum password length and your password strength. So do you do you want to include password sensitivity, a symbol in the password, a capitalization, a password number? All right, so this is you deciding how strong of a password setup that you want.
All right, so very, very helpful. One other thing I do want to point out is as a global admin, you do have the ability to see that we do have the capability for SSO here for QT9. All right. Now this is obviously something you would need to work with your IT and our IT on to get set up, but this does show you that you have the capability for SSO.
Now, as far as what you see under some of the other modules here, just pointing out, for a lot of them, you're going to see that you have the ability to define a minimum number of approvers for that module. So what we're saying here is if you're requiring two approvers for any audit, you can define that here.
All right. Now additionally, you do have this require all assigned. All right. So if you let's say your minimum number of approvers is two and require all assigned is unchecked. I could assign four approvers. And if two of them, if I meet the minimum number, and that minimum number is two, that means that the record can move forward. Now if require all assigned is on, that is not true.
Because if my minimum number of approvers is two and I assign four approvers with require all assigned checked, that means that I that every approver has to approve before the record can move forward. All right, so you get to make that distinction here at the global level. Now you'll notice as we look at some of these other modules, you know, same thing for change control. We can define our minimum number of approvers, same thing with customer feedback.
Now, some of them are going to have so some of the settings in here are going to have some additional settings. All right. So for example, with cur with ISO Actions, you can decide your kappa mode. Do you want to go with the standard format or the a discipline format? All right. And the decisions that you make here correlate to the record. All right. Because as an example here, if I was to turn on a discipline, and in this case it is, you'll see that I have this analysis tab here.
with an immediate containment action, permanent corrective action, and preventative action. If I had selected the standard layout instead of analysis, this would actually be listed here as action taken, and it will only have one field that says action taken.
All right, so not only are we defining minimum number of approvers here, we're also making sure that we're setting up the module as we want to. One of the other big areas that you decide in here is on your document control.
Now, with document control, this area in particular, there's a lot of different settings here. And the reason these settings are so important is these settings are going to dictate certain behaviors of the system. Now, what I mean by that, of course, is for document revision training as the example. So you get to decide during a document revision if training is required or not. Now, if you do decide that it's required, this setting here defines when the
training record is actually created. So you can either have it created after the revision becomes fully published. So after it's been approved and after it's been published or after it's been approved but before it's been published. All right so this is a great example of you deciding certain elements of how the system actually works.
All right, so this approvals and miscellaneous, this is so much more than just defining your minimum number of approvers. All right, there's a lot of options that you want to be mindful of as a global admin. All right, because one of the other great examples here is the documents by department. If I check this, that means I'm restricting documents by department. So if this is turned on.
This means that users will only see documents for departments that they are directly assigned to. So at the system level, we have a lot of power and we have a lot of ability to determine how certain modules really, really function.
All right, so there's a lot of good settings here for document control that you want to be mindful of. Same thing goes with engineering change requests and engineering change notifications. All right, so each one of these, as you see here, are so much more than just deciding the minimum number of approvers. All right, for risk assessment, of course, we have a minimum number of approver, but we also have to decide or define our maximum risk score.
All right, so looking through here in each one of these, we have a lot of information that we want to or we have a lot of different options that you want to make sure that you're mindful of.
Now, being a global admin doesn't just mean that you've got access to the system settings. You can do so much more. All right. Now, outside of the alerts and outside of the approvals of miscellaneous, one of the other key things that you have access here to is user-defined fields. All right. Now, most of you I have seen a good part of the system already, but an important thing to keep in mind here is that user-defined fields appear in just about
every module that we have. There, of course, there are some exceptions, but this user-defined fields down here are blank by default from QT9. So ultimately you get to decide when these user defined fields are populated and what they're populated with. All right, because what these are for of course is for you to decide or for you to add any type of additional fields or information that we may not already track inside of the system.
Alright, so user-defined fields are actually built at the global level. So again, we're under global, under settings, under user-defined fields. And in here we can see for all the different elements of the system. So for a corrective action or for the supplier corrective action. All right, for change control. We can, of course, as an admin go in here and we can build questions as we need to.
We can build multiple sections of questions here. So let's say I needed to add a new UDF section for quality, for plant management. I could easily do that just by clicking on the add new UDF section. I would type in a title, I could optionally add a description, and I can save.
Alright, so once I build a section, then I have the capability to add user-defined fields here as I see fit. So if I click here on the add UDF, it'll allow me to type in the question and it allows me to determine my response type. Alright, and there are four different responses that you want to be aware of. You've got open, closed, multi, and numeric. Alright, so open means that you're going to ask a question and they're going to have
Basically, an open text field to respond with more of a paragraph response. Closed is different. Closed means you're going to ask a question and you're going to provide them responses, and they can select one of those responses. Multi means it's very similar to closed, except in this case, you're going to provide multiple responses and they can select one or many of those responses. And of course, you have numeric response.
So that means you're going to ask a question and the only response can be in numbers. It'll be in all it'll be a text field, but it will only accept numbers. All right. And additionally here, you do have the ability to make questions required.
All right, so that being said, you've got that you can make this required, and that means that anytime this is that anytime somebody creates a record, in this case for a change control, this is going to be a question that has to be answered. Now I always caution all of my global admins to be very, very mindful of what you make required. And I say that because we already have a decent amount of required fields for many of the modules.
If you add in 40 UDF questions and make all of them required, it's going to obviously slow down the workflow. So it is really important to be mindful what you make required because as I said, if that's checked, you are telling the system that this has to be answered for every change control or every, you know, for every record that comes through here. All right, so use it user-defined fields are a very great tool. However, you need to be mindful how you use the requirements.
Now, as I said here, you can see that we've got them for corrective actions, change controls, customer feedback, deviations, document control. So these all get their own independent set of user-defined fields. Now there are some modules that don't have this. So calibrations don't, ⁓ audits don't, but again, you define those or you build those in a different manner.
All right, now from a system settings perspective, that's a pretty good starter to get you guys into here to practice. Remember, if you guys do have questions, we do have somebody answering questions here inside inside of the webinar today. So do make sure that you ask if you have any additional questions.
All right, now one of the other areas that falls under the purview of the of your global admins here is getting data in the system in the first place or adding large volumes of data later on. So to help do that, we actually have under the global menu, under the tool area, you're going to see that you have an import data section. All right, so import data, this is going to bring you into the import data area.
Now I do want to point out with this is that these are all of the different import types that you have the ability to run.
All right, so we can see that we've got a user import, we have a customer import, supplier, product, employees. So we have a lot of different options in here. Now, if I need the import template for one of these, all I have to do is check the radio button next to what I want, and I've got the link right here. So here I could click on this and this would download a copy of this to my computer.
All right, so that will allow me access here to open as I need to.
All right, now and when it opens, just like always, it is going to open with two pages available. All right, so you're always going to have field definitions here and you're always going to have the actual sheet for your data.
Now, an important thing to keep in mind is even though you're a global admin, one of the biggest things that we recommend is that when you do fill out these import templates, that you do relay them back to us here at QT9, mostly because we want to have the capability to check over everything and make sure that the data is coming in correctly. All right, so this is kind of a key element here. It does really help ⁓ to make sure that you are able to get the data in correctly.
All right. Now, one of the other key elements here is not only adding suppliers and products, you also have the ability to populate employees for the employee area here. All right, so in this case, ⁓ bringing your employees into the system is a very, very key element of what we do. Now, I'm not going to go through the imports today. We do cover those during QT9 university sessions. So if you do need to join in for one of those, we do recommend that you do so.
But one of the key things that as a global admin that you need to be mindful of is this. There are or there is a distinct difference between an employee of the system and a user of the system. All right. If somebody is only an employee, that means that they all they're going to show up under the employee list here and that they likely will only have the capability to and to essentially do assigned trainings. All right. And an employee cannot log in to the main QMS site where we've been today.
The other item here is that users are different. All right. A user has the ability to actually log into the system and actually use a concurrent license. And they can be involved in document control, in corrective actions, in safety, and customer feedback, whatever the case may be.
All right, so employee import is nice because it does populate both your employees and your users. So this is a really key one to be very, very aware of if you need to add a lot of employees or new users into the system at one time.
All right, now as part of the import area as well, you'll see down here you've got a site legend. That's really important as well because really what's happening with this, this is the system telling you the site ID number. And most of these imports are going to require you to have the proper site ID.
All right, so from an import perspective, this is a very, very helpful area. Again, this gives you access to all the data imports that you need. And of course, when you fill those out, you can relay the relay those to support at qt9software.com, or excuse me, ⁓ QT9 or support at Qt9software.com, and we can get you set up with that.
Now, outside of the data imports, all right, there are there is one other important tool under the tool area. So if you look under global, under tools, and under new system doc import, this is where you actually have the ability to bring previously approved documents into the system. All right. And this is more of a one-by-one requirement, more of a one by one process. There is a bulk import process that, of course, if you need help with.
We can definitely get you in contact with your implementation and training specialist, and they can help you with that. But if you do need to just bring, let's say that maybe a couple documents were forgotten on the main import, all you need to do is provide some basic info here, such as the site, the name, the revision level, the department it belongs to.
The document type that it is, you can optionally add a category. You do need to define a previous review date, and then you're going to upload your master file. Alright, so this is you selecting your basic information here, or selecting the master file for the document. So in this case, I could grab this information here. Alright, and I also have the ability to add a display copy.
All right, so the master file would be like the protected copy that you want to bring into document control, whereas the display file could be a non-editable version that you want to provide for your end user. Now, once you add that information in, of course, you can import your documents.
All right, so this allows you to add previously approved documents in a one-by-one setting. So this is a very helpful tool to have, especially if some items get missed during the bulk import.
All right, so very, very helpful.
Now I know we've spent a lot of time on the global menu, all right, but this is a this is kind of the bread and butter for a lot of your global admin features. But there is one area that I taught that I mentioned that we're going to discuss today, and that is under the manage, maintain menu. All right, because under here you're going to see a lot of different options. All right. What I mean by that is for each one of these options,
You have the ability to go in and build these drop downs or these types, categories, or dispositions. Now, as you look through here, you see I can build document types, I can build document categories. All right, so we'll use ISO actions as our example today. All right, because this is where not only so under the global settings, we're dictating behavior of the module and how we want it to work. Under the manage, under the maintain area.
We're actually building the drop downs with our information. All right. So with that being said, you can easily click here under the corrective action types. Now, corrective action types, this is actually one of the areas that we have predefined ⁓ information in. Now you can decide if you want to use that or not. But your corrective action types, you can see that these are the ones that will be available under a drop down for a corrective action.
So just to give you a just to give you a visual here, these are the different corrective action types we have. You will notice there are some that are marked as an active. All right, now if they're inactive, then they will not show up under the drop down for car type. So let's go back to this corrective action. The car type here, this is what's being dr this is what's being dictated by your corrective action type list under the manage maintain menu.
All right, so I'm building this drop down to meet my internal needs.
Now I can do the same under the manage maintain ISO actions, I can do the exact same for my problem types. Because my problem types are my secondary level of categorization for a corrective action. They're the only level of categorization for a nonconforming product. All right, and again, that problem type list is populating this drop-down list here.
All right, and this and again, this list is actually d blank by default. You get to define your problem types and what makes the most sense for you. All right, if you do need to add a new type, all you have to do simply is click on new type, type in the name, and save. And if you do have an existing one that doesn't that essentially is no longer required, you can easily check check the box and check inactive and save.
All right, so just giving you some examples from there, but just pointing out under the manage maintain menu, you have for each module here, you'll see all the areas that you can build out. All right, so for auditing, that's a great example. We can build our auditor list, we can build our audit types, our audit categories, our processes, and we can view the quality standards that are in there. Now, some of these are going to become pre-populated with data.
Some of them will be blank so you can build them to what you need them to be. All right, but the manage maintain menu is only accessible to your global admins. All right. The only other people that will see this are your site admins with the data admin user designation. Now, even though somebody's a site admin or a data admin, that doesn't mean that that gives them any access to the global menu. This is unique and specific to your global admin.
Manage maintain can be touched by a few different admins, but primarily your global admins are likely the ones in here doing most of the work.
All right, so the last thing I really want to touch on with you guys today is talking about how to add additional users and how to assign user designations. All right, so let's say that you have a new user joining that you just need to add one on the fly. It's actually very simple. Now, if you want to just add a new user only, you could go right to the manage and user administration area.
You could click, and again, that was under manage, under user admin, and then under here you can click on the add new user. Now in order to do this, I need a couple pieces of information. All right, so I do need a full name.
I need an email address for them.
All right, and I do need to add a username in here. So in this case I can say J Smith.
Now you do define a password for them. Now, as a user, they have the capability to make to change this once they actually sign in. But you can assign them one at first just to get them their initial access. The other thing that we need to define here is their default site. So if you have multi-site, you need to define the primary site that they're going to be assigned to.
Now, once you do that, of course, you could save your user.
Alright, so in this case, all I would have to do is make sure I have a unique full name, username, password, and then email address to find the site, and then save it. Now, once you save, that's going to open up some different areas in the bottom of the screen. So in my case here, let's grab Adam.
So for Adam here, we can see plain as day here that he is not a global admin, he is not a data admin. You can make those decisions at any point in time, but you do not need to give them these unless they absolutely need them. And remember, if somebody's a global admin, they don't need data admin, because global admin trumps any other user designation inside of the system.
All right, so if somebody has global admin, there's no need to assign any type of user designations down here at the bottom because global admin essentially means that they can do everything in the system regardless of what their designations state.
All right, so these are very important. Now, down here at the bottom or to the left, you have the ability to assign them to multiple sites. Now, when you assign somebody to multiple sites, let's assume maybe you have five different production locations, and maybe this individual needs access to three of them. You can give them access to all three. All right. But the important thing to keep in mind is that if they are not a global admin,
You will need to go to each individual site and assign them their designations. All right, because under the designations tabs, these tie to a specific site. So what you have at the corporate site could be an entirely different entirely different set of designations from what is at the Boston site in my example here. Now it'll tell you here the current site.
And if you look here under the user designations.
Again, they could have an entirely different set. So if somebody needs access to, let's say, only the ability to view documents at Boston, I could give them doc list only, and I could save that site designation. So that is just for Boston. Now I could change back to corporate. So I'm going to click on the edit button next to corporate.
And I could go back into the user designations here and I could assign maybe they are a doc admin at the corporate site. So I could go through here and I could save that designation. All right, so now for each individual site, I have varying degrees of access.
All right, so the important thing to keep in mind here is that all of these designations on a multi-site setup, these are all unique to that site.
All right, now one tab that I do want to go back to here is this details tab. All right, this will show you if this is the default site. And again, there are these little bubbles next to these. So this will tell you. So your default site is the site where the user will perform the majority of his or her work. If selected, site drop-downs on all forms will initially be populated with this site. So if you define a default site, that's telling you that.
If they're assigned primarily to the corporate site, that will be the default that shows up in any of their drop downs for any time a record is created.
Now under the site details, you also have this doc portal, site admin, and inactive.
So if you have the document portal turned on, that is the document viewing portal. This is an add-on service. And effectively that allows somebody to only view documents through that portal. So if you need to assign multiple people to view documents, but you want to limit the number of ⁓ seats that you have for the main QMS, the document portal is a great add-on. All right, because that allows you to keep your licenses lower on your main site because that
Doc portal has its own set of licenses. All right, so the doc portal, this is where you actually give them access to it.
The other thing, of course, is a site admin. Now we've talked a little bit about the different admin types. Site admin is unique. So a site admin, I could give somebody site admin for the corporate site. What that means is that they then can do anything inside any module inside of that specific site. However, they only have limited access to the manage maintain menu. They have no access to the global menu.
But a site admin will show up in each and every drop down inside for assignment inside every module. So they'll show up as a potential responsible party, as a potential approver, or as a potential verifier for any record.
All right, so site admin essentially is giving somebody free run of every module at a sp at a specified site. All right, that is not across the board like a global admin.
All right, now one last thing I do want to impress here is under the user administration, you also have the ability to assign departments. Now these correlate directly to the document control. So under here, if you assign departments and you define a document approver, this means this is how you would actually set up a non-admin user to be a document approver.
All right, you would define the sites that you're excuse me, you would define the departments you want them to be able to approve for. You would check the box here, and then you would add. And that would allow them to become a dot a non-admin document approver.
Now, one other thing I do want to point out here, as a global admin, you do have the ability to inactivate your you inactivate users that are no longer with your company. So if you do want to set inactive, you can just click here on the inactive box and save the user. That will remove any access that they have to the system. You also have the ability to delete a user as well. Now, if you delete a user, I do want to point out that it is a soft delete.
You'll always be able to see them in the grid and they'll show up here under the is deleted column. So as an example here, Aaron is deleted. You'll see that. So Aaron has no access to the system, but they still show up in this area. So as I said, this is a soft delete.
All right, so from a global admin user perspective, that's a lot of the core information that you guys need to know. Now, of course, there are of little nuances and other things, but of course, and you can always reach out and ask about that. But realistically, this is to get you guys started and to get you ⁓ essentially acclimated to what you have. Now, if you do have any other additional questions, do make sure you put those into the chat or into the questions area. But
The other thing is under the help area, this is essentially your best friend as a global admin. Because under the help file in particular, this is going to give you a ton of information that you're going to need. All right, specifically, this is going to give you the ability to view or see certain things about the system. So if I want to see the different user designations as an example, I can type in user in my search bar here. I can go to user site designations and permissions.
This tells me what each one of those site designations that we talked about earlier, that we were just talking about, what each one does. All right, so this gives me a pretty good idea what somebody can do or what each user designation allows a user to do.
All right, so in this case, you can go through here and you can view what's what's available. There is also some additional new information under the add new user. So this tells you what a global admin is, what a data admin is. So the the actual help file is going to give you a pretty solid idea of what goes on. And this is going to give you definitions and explanations about the system.
All right, the other thing you have at your disposal is your training academy. All right, so from a training academy perspective, this is more our version of work instructions on how the system actually works. So if you want to go in and see more step by step on how to create new sites, we actually have information here.
All right, so we have lot of information available.
Now, one other thing that that is a common question among a lot of our clients is how many recommended global admins do we recommend? Now, in my mind, I would say this is a pool that should should remain fairly shallow. And what I mean by that is keep in mind, with everything you've witnessed today, is that a global admin that is unprepared can cause problems. So it's important to keep that list fairly low.
So I would say it's not unrealistic to have maybe three to five global admins at most on a multi-site setup. All right, because you can have, of course, a lot of site admins and people of varying degrees. But having a specific set number, we don't really have one, but I would recommend at minimum having three to five global admins that are well versed in the system. This in my this in my experience tends to help.
⁓ the most or kind of keep everybody moving forward in the system. Even if somebody leaves, that means that somebody still has the access that they need.
All right. But that is everything I wanted to cover with you guys today. I'm really glad that you were able to join the webinar. I am going to check the question area one more time to see if we have anything unanswered at this point. And if you have any last minute questions, do make sure you put those in there.
All right, I'm not seeing any questions coming in. But again, thank you guys so much for joining today. ⁓ there will be another session of this on Thursday. And after both sessions have been completed, the recording will be post posted here on the news feed. Now, if you guys do have any ⁓ module training that you need or anything that would help, you always have access to QT9 University. So you can go in here and you can register for classes at any point in time.
And as a global admin, I would definitely recommend going in here and getting well versed in each and every one of these sessions. We do cover basic build out of each module. So that will give you the information that you need. All right, to be effective not only at the module level, but at the global level as well. All right. But again, thank you guys so much for your time today. We're so glad you joined us. Have a great rest of the week. We'll talk to you soon. Have a great day.
Questions From This Session
What can a Global Administrator do in QT9 QMS?
A Global Administrator has full access to QT9 QMS, including every site, module and record. Global Admins can configure system-wide settings, manage users, create additional Global Admins, configure alerts, approvals and user-defined fields, and administer the entire QMS environment.
How do Global Settings affect QT9 QMS?
Global Settings control organization-wide preferences such as quality policies, alerts, approval requirements, password security, user-defined fields and notification settings. These configurations apply across the entire QT9 QMS environment and help standardize quality processes.
What is the Manage Maintain menu used for in QT9 QMS?
The Manage Maintain menu is used to configure module-specific dropdown values such as document types, corrective action types, problem types, audit categories and priorities. These settings determine how users classify and manage records throughout QT9 QMS.
How do user-defined fields customize QT9 QMS?
User-defined fields allow organizations to add custom questions, sections and required fields to many QT9 QMS modules. This enables companies to capture organization-specific information while maintaining the validated core functionality of the software.
How do Global Admins manage users and permissions in QT9 QMS?
Global Admins can create users, assign sites, configure administrator roles, manage permissions, activate or inactivate users and define department access. They also control security settings such as password policies and document approval permissions.
How can Global Admins import data into QT9 QMS?
QT9 QMS provides import tools that allow Global Admins to import users, employees, customers, suppliers, products and approved documents. Import templates simplify data migration while helping organizations quickly configure and maintain the system.
Key Takeaways
Presenters
See QT9 QMS in Action
Discover how QT9 QMS helps organizations streamline compliance, prepare for audits, and manage quality processes more efficiently.
Request a Demo →Explore QT9 QMS in Action
Take a self-guided tour of QT9 QMS and see how organizations manage audits, supplier quality, CAPAs, training, document control and compliance from a single platform.
Launch Interactive Tour →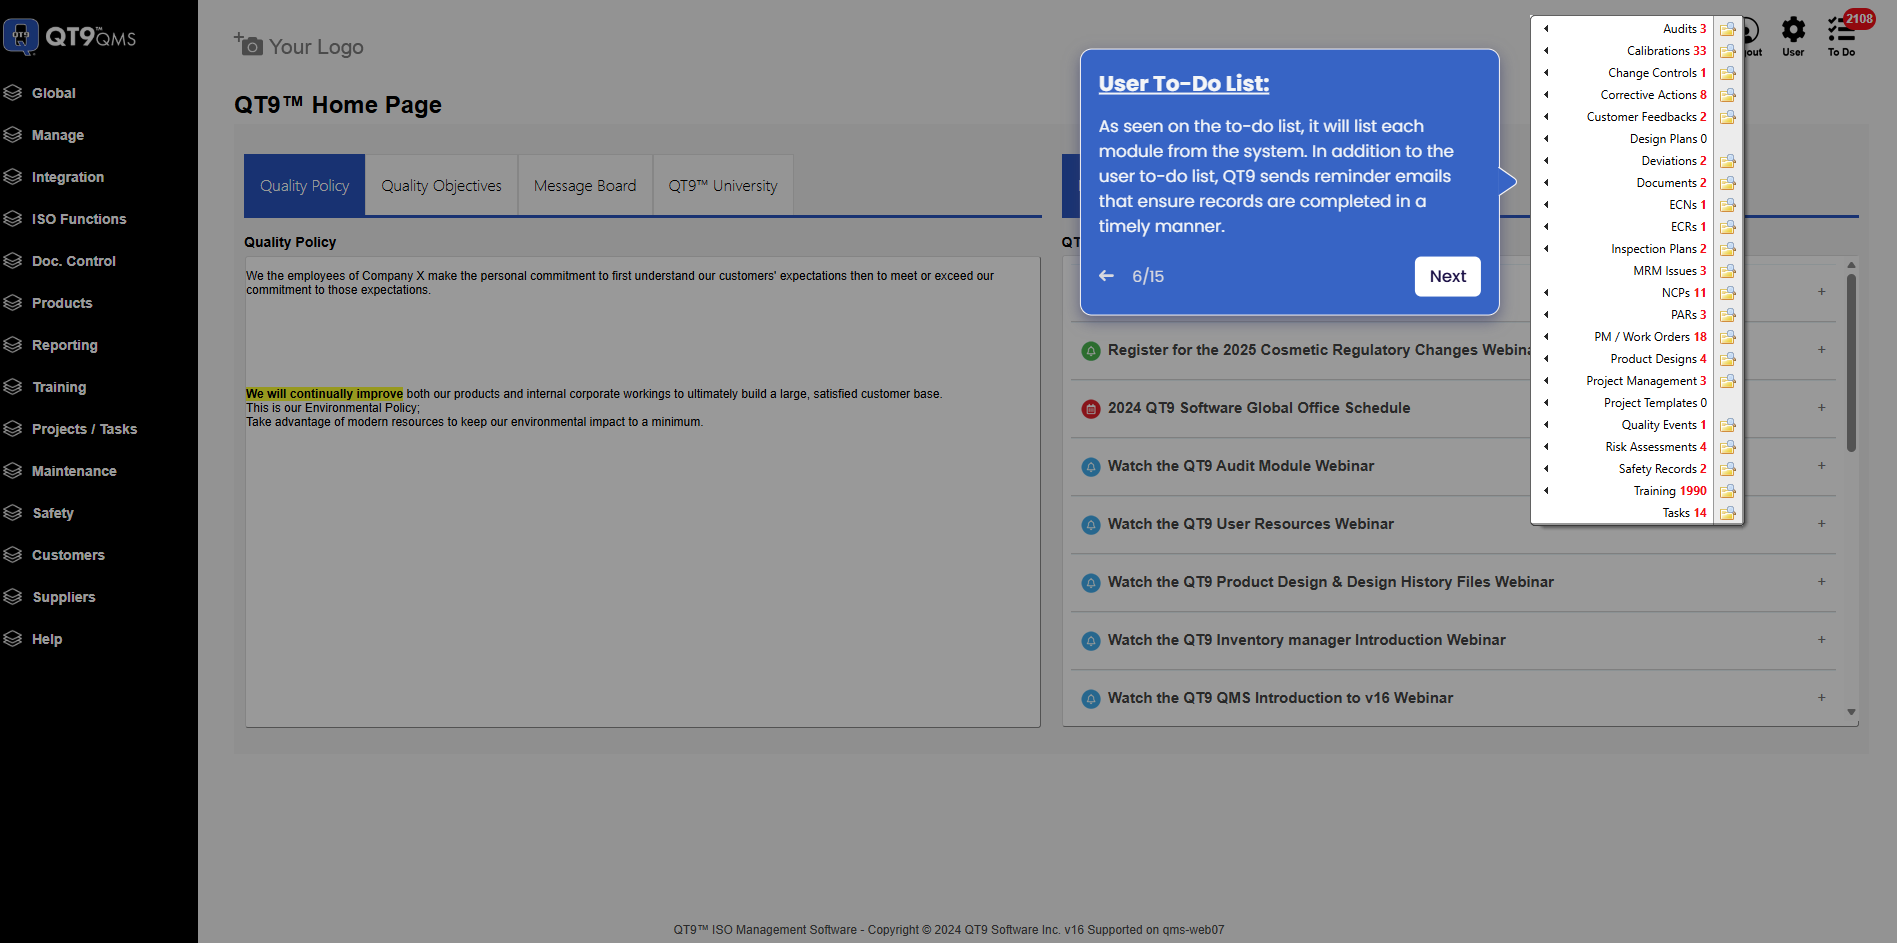
Simplify Quality, Compliance and Operations
Start a Trial
Try QT9 free — no credit card required.
Start Free→
Schedule a Demo
See QT9 live with one of our product experts.
Book a Time →
Get a Quote
Get custom pricing tailored to your team size.
Get Pricing →