
QT9 ERP 2026 First Look: Rework, Contract Service, Potency & MRP Forecasting
April 2026
Full Webinar Transcript
2026 04 07 QT9 ERP 2026 First Look Webinar (00:00)
Good morning, everyone. Let me share uh our presentation for today. Thank you guys all for joining me today, and we'll get this thing rolling. What's new and what it means for your or operation? My name is Arton Security, and I'm the sales engineer and ERP implementation lead here with QT9 Software. Today's session is a guided high-level tour of what's going to be new in QT9 ERP 2026. Well, they focus on the features and the modules that can make the biggest impact on day-to-day execution.
Speed, visibility, control, decision making across your organization. Whether you're an existing QT9 customer evaluating the upgrade, currently implementing QT9, or a brand new and and or brand new and exploring options, the goal is simple that you walk away knowing that these updates can simplify processes, improve visibility, and fit natural naturally into your existing workflows.
We're going keep this practical and straightforward. I'll I'll walk you through key highlights, show examples of how teams would use them, and leave time at the end for a Q<unk>A so you can connect what you see today to your specific environment.
Alrighty. Now before we dive in, I want to take a moment and thank both our current customers and prospective customers for joining us today. We truly appreciate your time and interest in the QT9 platform. Being part of the Qtan community means partnering with us to support compliance today and adapt to regulatory demands in the future. We have attendees from a wide range of industries on this call, so for today, please keep your questions aligned with the new features coming in version 2026.
If you'd like more one-on-one time or you have questions specific to your organization, you can reach out to your assigned implementation specialist or email us directly at support at qt9software.com. One of our specialists will be more than happy to help you walk through your specific use case across the system.
Alrighty.
Alright, so what we're going to cover today, we're going to be a lot of enhancements on the jobs module. But before we go into each one of those sections, let's talk about rework. Because this is something every manufacturer deals with, but most systems don't handle well. With QT9, rework now starts where it actually happens, whether that's a customer's return, something caught during production, or existing inventory. And the key here is traceability. Every step, every action, every movement is tracked.
without forcing you into any manual workarounds or side processes. So instead of breaking your system to handle rework, the system now handles handles it the way your operation actually works.
All right. Next thing we're going to be looking at is our contract service module. You guys are probably familiar with the contract service functionality we had before, but this module enhances the contract service by bringing full traceability across all operations into one centralized view within the system. You can clearly see every open contract service operation, track what's been sent out, what's currently in process, and what's been completed, and returned all organized in a way that's easy to understand and act on.
It also gives you complete visibility in the history, so every transaction of movement is tied together and accessible when you do need it. The result is a more streamlined workflow, better visibility, and stronger control over your contract service operations.
Next on the docket here is going to be potency functionality captured and connected. Potency tracking is now built directly into receiving and production. What that means is potency values are captured where the work actually happens from incoming materials through manufacturing. You get stronger traceability and confidence of the potency data strays connected end to end. And most importantly, you achieve true potency visibility without slowing down operations. So
Incredibly important for our pharmaceutical and cannabis companies out there that are with us. this is gonna be a huge step forward for that piece of it as well. Oh, and my favorite, our forecasting enhancement, now superpowered with material requirements planning. This is a big one. Forecasting is no longer sitting off to the side, it's now tightly integrated with MRP. What that means is your forecasts actually drive planning in a meaningful way. You get better accuracy.
More flexible data input and full visibility into how those forecasts impact material requirements. And most importantly, you can go from a forecast to an action instantly with seamless job and purchase order creation. Oop, can't wait to show you guys that. That's why I was moving through those slides so quickly. Next big enhancement that we're going be going over today is going to be on our shop floor manager. This is where operators will feel the impact immediately.
We've redesigned the UI to reduce clicks and move faster on the shop floor because time matters out there. Now you can fully digitally time digital time tracking with no paper needed anymore. On the material side, pick lists, allocation, and reconciliation and are streamlined into one centralized experience. And para mi gente que habla español, shop floor manager ajora cuenta ga traducción nativa.
uh Tain tenemos an equipo in habla español que puede ir donde está para ayudarte con este sistema. And what I'm trying to say there is shop floor manager is now in Spanish. And now the complement shop floor manager now being in Spanish, we do have field agents that are bilingual that can help you implement this on the floor in real time, face to face. The goal here is simple less chaos and more flow.
All right, next thing we're going to be going through is our new integrations for this region for this version. Something that's a little bit different with us is our approach to integrations is focused on delivering a meaningful, curated set of partners that align with your operational needs and provide real value out of the box. These are integrations designed to work seamlessly with QT9, helping you extend functionality without adding complexity. At the same time, we recognize that every business has its own unique tech stack.
And that's why QT9 offers a free and open API, giving you the flexibility to build additional connections and integrate with the systems that matter most to your organization. So you get the best of both worlds: strong and ready-to-go integrations, and the freedom to expand beyond them as your business evolves as well. One thing I want to point out is our three integrations that are available for our next version is going to be PIA for credit card processing, Avalera for tax management.
And ShipStation for shipping management. One thing I'll say is we got early on for Pi and ShipStation. Those are already available today, and we'll see a sneak peek of ShipStation later. And Avalera will be available when the launch happens with 2026 at that point. And finally, there's more. With over 800 tickets in this system, there's hundreds of improvements that's been going on within this release.
Beyond major modules, there's a lot of enhancements across the system. These are the types of updates that might seem very small individually, but together they make a real difference in how efficiently your team operates day to day. You'll see some improvements in areas like accounting operations, along with refinements to existing workflows and usability and overall system performance. The focus is consistent across all of them. Make the system easier to use.
Faster to navigate and more reliable in your everyday processes. Because at the end of the day, it's these incremental improvements that drive long term efficiency.
All right. If you'd like more information about QT9ERP, you can visit our newly updated and upgraded website at QT9software.com for an in-depth demonstration or to discuss pricing. Please contact our knowledgeable sales team at sales at qt nine software.com. With that being said, let's go ahead and jump into 2026. Right off the bat, you guys will see that there is some updates visually to the system.
Our charts in the front have been updated and upgraded with a better color scheme and a little bit more information with tool tips at the top. You can move these items around now and kind of really customize your dashboard in a meaningful way. Now, this is just your starter pack. We do have our business intelligence tool to be able to take these to the next level to look at KPIs and different items that are important to you. But
Really, what we want to focus on today is the man the jobs area. The jobs went through a huge overhaul based on a lot of feedback we've gotten from our customers. So, what I want to do is kind of really run through what's different in jobs. You see that this whole list has been updated and upgraded. We have a lot of new features and functions and modules right into this area here. One thing you'll notice is that job manager is its own area now. It's only going to open up for
Um all the tabs are going to be separated out, and the job manager is going to be the only piece that's in there. So you can see all the other tabs have been moved out, and now you'll see your production list, job scheduling, and our new rework manager all made into their own modules. This helps with streamlining fish efficiency and speed throughout the system, and especially in the jobs, where a lot of data management is heavy in here. Big three updates that we're going to be going over today in the jobs area is going to be the rework manager.
contract service module and forecasting right into this menu right here. So you're gonna see a very jobs focused on our release this year. And like I said, we look we took a lot of our feedback from our customers around this. Alrighty. So as you can see, one other piece on here is that we have a clone job function right there. So I can go ahead and easily clone a job by clicking the checkbox and hitting the clone button. It will duplicate any job that I have open for quick and easy job creation.
All right. So one thing is we're gonna go ahead and open a job. We're gonna start in our rework area.
And you're gonna notice right off the bat our jobs record has been updated. Someone called Jenny Jones, because this bad boy went from geek to chic. Look at this, it looks fantastic. Now you could hide your job details, job costs. In here, you'll see that your tabs are in a nice flow. The routings is really where the main thing is going to be seen uh as a difference. No more menu menu menu that pops up.
You can check a box on here and have a function with a split using a contract service that we'll see a little bit later, or deleting the routing without having to click a button, do a menu menu, and then to take an action. One thing you'll see when you get actually into the operations themselves, those have also gotten a facelift as well. Very nicely put together with a way that data should flow as you're working through the system itself. um The tabs are now at the bottom instead of the top, showing a nice workflow.
of the uh module as it was before. One thing you'll also notice is that at the top you'll have these little arrows. So instead of getting out of the operation, trying to get back into it, I can just go to the next stop by clicking that arrow and moves you right over. And I can go right back without having to remove myself from the operation itself. One other thing I want to point out when we back out of this is that under the materials tab we do have a new function to be able to add a sub assembly job.
directly into here. So if you if you didn't create this from a top level bomb and it created your sub assemblies for you, if you already had a sub assembly job out there, you can attach it to your materials tab now so it can flow that uh the required uh sub-assembly to this job when it's needed. Uh nice little thing that we added here as well. Another update is going to be under the files tab. Not only has this been updated throughout the jobs area, but also alongside the rest of the system as well.
you also see on here that the item spec and the file attachments have been combined. They both went into a grid view instead of having the classic icon structures, you can search, sort, and filter for any documents that you may have. Nice little function on top of it is you can select all your documents, either print them or download them in bulk directly from the record itself, saving time, making you more efficient. All right, now that we've actually jumped in a little
Really high level on some of these items on the jobs record. Really want to go over how does rework work. So there's three ways we can do rework in our system. It's going to be in process during manufacturing. It could be done through a customer return. And then finally, directly from our inventory lots. Okay. Now, what I want to do is kind of show you the rework manager before we actually get into the actual rework functionality itself. So the rework manager, as you can see right under job manager,
Is a centralized location where all your rework is going to be. As you can see, no rework jobs just yet, but that will change soon. Alrighty. So again, centralized location, wherever you kick off the rework, it's going to end up showing in here, whether it's a rework job or a rework routing. You can see on here there's two differences. Rework routings are going to be anything that's kicked off during an in-process job.
And then a rework job is gonna be something like a when you kick off a job from a inventory location or from a customer return. All right, so then you could fill through them by clicking these check boxes and they give custom grid layouts depending on what you need there.
All right, let's bounce right back to our job manager and let's kick off our cutting operation here.
Alrighty, so you can see we're in our cutting operation. We're gonna go ahead and start it. As you can see, starting and hitting these buttons is really quickly uh entering data at this point. No more click and wait for it to load into it. That's giving you more and more uh quick and streamlined processes throughout this as well. Alrighty, so let's say we're working through this job and we're doing a bunch of cuttings to this piece of itself, and let's say five of them are gonna be good, so we're gonna ahead and save five on here.
Let's say five of them went through some sort of inspection or testing, and now that they have to be reworked. All right, so I can kick off my create inspection that's going to be connected to our quality management system, QT9QMS, which will handle all my inspection records and handle all the quality side of everything that I do with my production process. But right now, what we want to do is hit this rework button. So by hitting this rework button, it's going to create a new operation. So it's going to say, cool, we're going to get this one operation and rework.
is gonna ask me to fill my quantity. So my starting quantity for this rework is gonna be the other five that I didn't use up or didn't create in my last operation. So I'm gonna say five of them were good, five of them need to be reworked, so then I can go ahead and start this up right now. One thing you'll notice is that this sequence is going to match a sequence of the pro the operation where you kicked it off from. You'll also notice that you have a re rework toggle on here that will be turned on and locked in. I cannot turn this off.
This is a functionality that's built right into the system. Now, what you also notice, if I go ahead and save and close on here and go back to the jobs record, what it's going to show on here is you'll see cutting and then rework-cutting automatically set for you. What you also notice on here is the math the math is mathing. So what you're going to see is the five that I created in that first operation that I can actually just go ahead and close out because those are done. So I'm going to go ahead and close this operation out.
Make it completed, leave my five in there, hit save and close. Super quick, super seamless. If you have any rates, you're gonna go ahead and calculate them at that point if you choose to do so. But this will get this operation closed out, and then the rework operation is going to be the next on our docket today. One thing I'll mention is that um we're gonna go ahead and bypass that.
One thing I'll mention is that we are still in validation currently, so we might see a couple of quirky little messages here and there. Uh I just couldn't wait to really show you guys this. So I didn't want to wait for validation to be done. So here we are today. Alrighty. So as you can see on here, my finished quantity is five. Already good to go. So I'm gonna go back into my rework. I'm gonna go ahead and do my rework. Just like any other part in the operations, you can go ahead and have routing steps, you can add routing labor.
um any kind of information like that as needed to this uh to this operation itself. Once I go ahead and close it out, I can say my finish quantity is going to be five here. I'm gonna close out this operation, just like you would any other normal one. This one's just dedicated to read.
So as we close that out, now we're gonna see a rework and cutting been completed. And we're gonna see our we got the five from our completed operation. We got five from our rework operation, and that's gonna give us our 10 starting quantity for our next dot. And you can do rework on any one of these operations. So if I went in the drilling and did the same thing, maybe five of them went well, so we can go ahead and close them out, but then five need to be go ahead and done as rework. Same idea there, same process. You guys can do this endlessly throughout this.
throughout this job as needed until that is worked properly. So again, when we go back into here, you'll see that these are going to be locked between sequences. So if I kick it off in sequence two, that rework is also going to be sequence two. The rework dash drilling, rework dash cutting, you'll see it's all in line, very easy to understand, very intuitive to get this thing rolling. Same idea here. Alright. So you're gonna go ahead and close this out just like any other job.
So we're gonna go ahead and close these a quick operations out.
Bada bing, bada boom. You're closing the job. Super easy. Super quick. As you can see now I don't have to go jump around to find my buttons. They're all in a nice triangle formation, just like the Dynasty Bulls used to run all day.
Fantastic. Alrighty. We're gonna keep this thing moving and go ahead and complete it that last one. And we'll finalize this rework for drilling and then we'll go ahead and close this rest of this operation out or this job out.
Fantastic. Alright. I'm not going to finish this last assembly. I just want to show you guys you can just simply click this right here and hit delete. You don't have to go into the operation and delete it anymore. Makes it super easy. It's gonna just give you those same old warnings if you did have any materials assigned or anything like that. But at this point, I'm ready to roll. This job is good and ready. Alrighty. Let's go ahead and complete the job. This is gonna be a normal completion just like anything else.
All your roll up costs, whether it has rework or anything like that are on it, it's gonna give your side by side comparison per usual, just like any other job. You just have added functionality in there that really just streamlines your
Alright, so that's how you do it in process. All right, so we got that one done in process. Next thing I want to show you is how do we get this done from a customer return? Let's go ahead and take a look. One is we're going to go ahead into our RGA module. So we're going to go into customer returns, returns and credits.
And we're gonna go ahead and kick this off. We're gonna need a return from our friends over at Astro Medical Devices.
And then we're going to pull from the sales order in here. And I picked the serialized item because I want to show you even with the rework before with our operations, a serial number gets consumed and you lose uh you know traceability to it. Not anymore. Um with the new rework module, you get to keep the traceability of the uh the actual serial number as well as the lock number in there too. So go ahead and select this one here.
All right, unit price is 250 bucks. I'm gonna say I'm gonna go ahead and return one unit from here. Customer states uh a NCP nonconforming product. Please test and rework. All right, so you're gonna see that note coming through. I got a call from a customer saying there's a nonconforming product, we're ready to roll. We're gonna go ahead and get the RGA started uh started to go here.
Alright. One thing you'll notice on here too, your linked orders will come in, show you your parts on there too. Alrighty, let's take a look here. Just like any other return, we're gonna go ahead and process this order or this return. And we'll see that it's update. Anything that's been processed is gonna go right into our RGAQ. And you can see I got our astromedical devices right at the top there.
All right, so now you'll see a couple different things on here. You just have your typical quality issue like we had before, but now we have this flag for a rework slider right there. So we can go ahead and flag this for a rework. And then say that we have go ahead and receive the quantity of one. First thing I have to do is select which lot this originally came from. And then which serial number am I going to be returning?
So these are the serial numbers I shipped out on this item. So I'm going to go ahead and return number 26. So you see serial number 26 is being the one that's going to be returned. We're going to go ahead and add it to the return itself. All right, as you can see, I brought it in as a non-available status. So it's quarantined. No one can go using their job or ship it to a customer or anything like that. It's something that you can just see right there. All right, we're going to go ahead and receive.
Once you receive this, you're going to see that rework job created for RGA 1691. If you're wondering where did that end up, right back where we started in our rework manager. So let's go ahead and refresh. And now we see our RGA job is right in their way for us. One thing that you'll notice is we automatically name the jobs from where it's coming from. So you can see you can see in the job name rework for item serialized motherboard from RGA 1047. So it gives you a real clear line of sight.
Searchable text to really find and get back to your you know rework as quickly as possible. All right, so we'll go ahead and see MFG 1732. Let's go ahead and take a look at what that looks like in the inventory. By the way, while we're taking a look at the inventory, this has been updated and upgraded as well. You see that the manufactured inventory and the purchase item inventory split out the available lots and the lot history, one to speed up the process of loading the data into these grids.
Intuit, so you can have these in this information readily available, not having to toggle things like we did before. All right, so let's go ahead and look at my available lots.
Right here and where was that one? Let's go back to my rework manager real quick.
Yeah.
All right, this might be the one unit I just brought back in. It is not. Let's go check that other lot.
All right. So you can see on here a lot of stuff been happening on this lot. But as you can see, return on this one for serial number twenty-six, and then it gets added to automatically added to a job for manufacturing. So we see the return uh inventory transaction, the manufacturing inventory transaction. You can see like in the notes, it's been assigned to job sixteen ninety-one for rework, still not at non-available status. So
As you can see, you can look at it right into your lot schedule right off the bat to see where that where that is going. All righty, let's go ahead and wrap this rework up. When you get in here, the process is exactly the same. You're gonna go in here, work your rework just like anything else, finish it, uh finish the job just like we did previously in the last example. Difference now is you can kick off a lot of quality issues directly from that return. You can kick off a customer feedback record in the quality management system for QT9.
And then start doing an investigation. Based on an investigation, you decide to do a corrective action or training. You can also daisy chain all those records from the ERP return to the quality management system and a nice audit trail from record to record. There's something to keep in mind as you guys are working through some of these things with your teams. All right. Last way a last time or last way to do this is going to be from the inventory itself. Let's go ahead and go back in the inventory.
And let's go back to my manufacture lot inventory.
And then let's go ahead and take a look at that.
Serialize motherboard again. Alright, so let's see if we can find that one here. Let's go ahead and use this one for our rework. So you see we have serial number 24 right here. It's been done from a finished good from job 1683. New button on here, as you can see, create rework. So this create rework button will go ahead and kick off a rework job directly from any inventory, whether it's purchased item or manufacturer. So I can go in here.
As you can see, say where am I gonna be pulling this lot from? I think it was number twenty six that I wanted to pull.
Okay, looks like that one's not available. So let's go ahead and pull number twenty eight.
All right. So you have a couple options on here. You can either transfer the inventory somewhere else or do it right into rework inventory. So I'm going to grab number twenty eight.
Warhouse A.
Do you want to create a rework job for the selected inventory? We're going to say a resounding yes. So job 1692 created. We're going to go back into our rework manager. And now we see 1692 rework created from item serialized motherboard from inventory lot MFG 1732. Super quick, super easy. Let's go ahead and close this one out just so you can see that the serial number gets to stay. When I go into the serial numbers, you can see that number 28 gets pulled in automatically for me.
We're gonna go ahead and quickly close this rework routing very quickly here. Start time, end time, finish quantity, and then status. Go ahead and save and close. Way quicker than we did before. Beautiful. As you can see how quick that was. Alrighty, let's go ahead and complete this job.
And we know it's in lot 1732. Oh. Now you're gonna see rework quantities are gonna be in here now. So you're gonna see previous lot lot unit costs and new lot unit costs. So if there's anything that's been added, like labor or anything like that along the rework itself, you'll be able to see it in here. So um this will be breaking it down for you. And you'll notice it's a rework job because obviously I'll save rework quantities right there for you.
Alrighty. Let's go back in that lot. Now you can see it dropped off of our rework manager and then it's just gonna go right into our job history area uh down here.
All right, so seventeen thirty two warehouse B. See if we could just refresh. Most likely gonna kick me out.
E three already.
See and that's twenty four, that's the one we just did.
And there's your serial number 28 right there. So job from 1692 and gives you full traceability back to that rework job. No serial number lost in this process. All right. So that's going to be how rework works in our system. I suggest once we get the sandbox updated soon uh after validation, you can meet with any one of our implementation specialists. If you do have any questions, uh, you know, how do I do this with my process or anything like that? We'll be happy to walk you through with that.
All right, let's go back to the jobs manager. And what we're gonna work on next is going to be um contract service walkthrough. So let's go see what does contract service look like now. All right, if you guys remember are still using contract service beforehand, you had to go into the record, create a bunch of shipping paperwork, and then you had to go back all the way into the record individually to see where everything was. It's a little bit different now. We like to show we wanted to have like some traceability, and you can see contract service is its own major module.
Render their jobs. If you go ahead and click on it, we see contract service queue for any open contract service, close contract service to uh close any shipments to your contract service provider, and then contract service history. And once they're closed out, you'll see them all in one area too. So now you have that centralized location to be able to see your contract service operations in a very easy and meaningful way. Alrighty, let's go ahead and see what it looks like now. So now all you have to do, click the slow checkbox on here.
Great contract service.
Now it brings us to a real quick one pager. Again, this has also been updated and upgraded, really streamlined for better uh flow and efficiency. No more middle buttons kind of randomly throughout here. Um so we're gonna go ahead and get this create a new purchase order. Same like you did before, you're gonna add some unit cost on here. Maybe it's 25 bucks a unit, and when do you expect it to come back? Once I have these items filled out, we're gonna go ahead and create a new shipment, just like we've done in the past on here.
Now that elusive submit button is where is exactly where I'm thinking it's gonna be, right in that bottom corner, and hit submit. You're gonna go ahead and continue making your boxes, just like you did before. Got my boxes. I'm shipping out, I believe, 10 units on here. Let's say one box, all 10 units are gonna fit on that box, make it super easy. And we'll a little bit later we're gonna see how ShipStation is going to change this and make this a lot easier to use.
So we'll come back to this a little bit later into the webinar and we'll see what this looks like uh a little bit a little bit later for ShipStation. All right, so now that I have my boxes set up, I'm just gonna go ahead and save and add. Or should I really done save and close? Either way, all good to go there. All right, you see my boxes are gonna be on here. I'll delete this one.
Need that one.
All right, so all you have to do now is hit save and close. Beforehand, you would have to come all the way back to this area, look for contract service POs, and kind of trace it all the way back. Now all you have to do is go to your jobs menu, contract service menu, and then see your contract service queue. So now this will show all my open contract service that I have that still has not left the building. If I go ahead and click in here, it's gonna be right bringing me right back to where my boxes are. I can go and edit the shipment if I need to.
When I go to edit shipment, this is where I can go ahead and print my paperwork ah and then get everything going with ShipStation if you have that integration as well. So, and here you'll see your shipping details, shipping boxes. You can print labels directly from here. Pallets, if you need to palletize anything, is still in here as well, um right at a moment's notice. Now, difference now is I'm going to go to my closed contract service. See, maybe I just don't have this set up properly here.
GPS, alrighty. Gotta pick all these items so it can show up in that laxed area.
All right, so now as long as you choose your FOB and you have a carrier chosen, your closed contract service will show up in here as well. This works exactly the way that uh closed shipping works when you're shipping something to a customer as well. Same functionality, uh very intuitive. All you have to do when this leaves your doors is just gonna go ahead and process it.
Now on the way back, this the process is still the same. You're gonna go look for your purchase order for that contract service that you just put out.
And looks like it's this top one right here. And you're just gonna receive it just like any PO and just like any other contract service PO, once it's received and inspected, it's gonna go right back into the job. And then you'll be able to close that operation and job very seamlessly. Alrighty. So now just so like when I go back into the job after that, might be in PL inspection actually, which it is. Looks like this is an inspectable item.
Oop, wrong button. All right, we're gonna go ahead inspect it. See how it's rejected. Is there any kind of inspection that needs to be done? Even if it's a contract service and our quality management system, GT9QMS. Otherwise, we're gonna go ahead and inspect it. Just gonna go ahead and assign that material or that sub assembly or finish good right back to the job and close the operation out. When I go back into the job manager.
that's another thing I forgot to mention from earlier. We now have statuses on jobs. So I'm going to go back this up for a moment. You can see a status on here. So ready to complete means all operations are being completed in a job. And it's ready for a manager to go in and close it, finalize the data and close it out. Open means it hasn't been started yet. In process means it's been started, but has not been is not ready to complete. And completed or closed, as you can imagine, is when the job is done. So this will help you really understand where the workflows are.
or are what jobs are ready to be closed from a manager view. So we added these statuses. I didn't want to leave this webinar without letting you know about that piece. All right, let's go back in this Y Junction box.
All right. Now we see completed is the status. It's all done. Now this operation or this job only had one op with me, and that's just the contract service operation. I'm gonna go ahead and close it out and wrap that close that loop as needed.
All right. So that's contract service. Now, as you can see, it's really quick. It has nice v visibility. Um, you know, it it's easy to understand and you know where everything is at all in one shot.
Alrighty. Next thing we're gonna look at today is potency. So this is really geared towards our pharma medical device, uh excuse me, pharma and foods possibly. Uh nutraceuticals are out there, cannabis companies. Uh potency is gonna be something that's important that we're gonna see not only from the manufacturing side, but also the receiving side. Now let's go ahead. I'm gonna be making some amoxicillin capsules in bulk right here. Let's go take a look and see if I have enough in inventory.
Looks like I'm gonna have to put in a purchase order for this. So I'm gonna go ahead and kick this, check this on here and create POs directly from my materials tab. Oh, happy little accident right there. Again, we are just in validation, so sometimes we'll be seeing stuff like that. All be ironed out prior to our release to our sandboxes in a few weeks. All right, let's go ahead and put this in manually then. I'll kick it off one more time. Let's see if it's gonna be friendly to me this time.
And it is beautiful. Second time's a charm. So on this one, we're going to go ahead and go to our friends in drugs and chemicals are us. So we can go get some APIs for this. All right. So we can see that we're going to get the amoxicillin trihydrate API. Uh, you know, it's a key item to make this to make this. So we're gonna go ahead and get this thing rolling. So I put in my basic information on here. I'm gonna go ahead and create and save. This is going to create a
Unprocessed purchase order number 2932. I'm gonna go over the purchasing. Unprocessed POs. And then go ahead and process it.
Alright, this will go through your normal approvals. If you do have any kind of approval set up, it'll still give you your like receiving sheets like you're used to. All that good stuff still stays. Um now we're gonna go into our PO receiving and look at our grams on here that we got coming in. So we're gonna go ahead and receive this just like anything else that we receive in the system. The only difference now is that we have a potency level on here. So you guys can capture potency level once you receive those items in. So I'll go ahead and bring those five thousand grams in.
I'm going to say my potency level is a hundred percent optimal. Yeah, I know that doesn't really happen all the time in the real world. For today's purposes, we're just going to use 100% for these items. We don't do any calculations of potency in the system. This is for you to do your calculations out the system and then enter them into the actual fields themselves. typically you'll get your potency directly from your uh raw materials provider as well. So we're going to go ahead and receive this item.
All right. We're not gonna inventory lot is raw 1886, but it should auto auto assign my raw materials to us, do that job for us automatically. So let's go ahead and double back to that. Alright, let's go let's go in back to our job manager, go on our potency webinar job, and we go to materials tab. As you can see, because I kicked this off from this materials tab, it already like auto-assigned that materials back to me.
So if I go and click my little pivot table item here, you see quantity is 5,000 needed, quantity transacted is 5,000, and it came from raw 1886 directly from there. Who did it create it? What trans inventory transaction that we use? All right. Now, what I'm going to do is I'm actually going to remove this inventory and then re-uh add it to the job. Because I want to show you like what you can do when you're adding a potency item on here. I'm going to go ahead and remove this.
So, based on the potency of your input material, when I go and assign inventory, that's gonna tell us how much of that. So I can go in and assign this manually if I wanted to. If I had like a lot of different lots on here or units, I could say based on this 100% potency, how much I have to put in here. This is an easy calculation because I'm using 100% potency, it's 5,000, we're ready to go. Maybe if you had less than 100%, you might have to.
add more quantity to it. So this is the calculation I was talking about that you would do outside the system and enter the values into the system to be able to process this properly. So it gives you that flexibility and traceability directly to the potency itself and being smart about how you're assigning these materials. All right, oh gotta actually assign some on here. That would be good. Fantastic.
Okay, awesome. And we're gonna go ahead and move on to the next piece. So that's gonna be potency in a nutshell for you. Uh very simple but sh and straightforward, but very powerful for what you need there as well. Next thing, I'm very excited to announce that forecasting has been upgraded and updated. This is huge. So when we look at forecasting now, it is directly tied into material requirements planning. You get to save your forecasts.
You get to name your forecast. It's very nicely done. So let's go ahead and walk through the forecasting process. So I'm going to go ahead and request a new forecast right here. You get to rename it whichever way you'd like. Two, uh, three, forecast. And then you're going to say what's my forecast end date, which is going to count the number of months you're going to do. So let's say I want to forecast this out, April, May, June, July. Let's go a four-month forecast on it. we're going to go ahead and hit next.
This is where you're going to be able to add your items. Now there's a number of different ways you can add items on here. You could do it in one by one. We could batch edit them afterwards. You can import them as well. So it gives you a lot of flexibility. So let me show you each way to get these items in. I can go in here, choose my my junction. Oop.
And then what do I think on a monthly forecast do I want? You don't have to be super accurate on here, and I'll show you why. So let's say I think I'm gonna do a thousand per month. I'm gonna go ahead and add it. Now, what you'll see on each one of these forecast months is gonna show a thousand on each one of these. Now, what I can do is do my batch edit. Oh, gotta choose my items first. And as you can see.
That I can go in here and edit these really quickly. So really in this month, I think I'm gonna go to twelve fifty and we're gonna keep ramping it up every month. Exponential growth. Who doesn't love that? All right, that's one way to get those items in there and they'll grow your uh forecast itself. The other way is through an import. So I can go in here, we can clear those.
We're gonna download the template.
Template is super simple, very easy. Part number, revision, month number, ready to roll. So if I go back.
And I use MFG one thousand.
got enable editing in here.
Revision nine by the looks of it.
And then let's do one, two and three.
Okay. Move these actually over and do the same thing. One thousand.
twelve fifty, fifteen hundred. So I go ahead and save that and I can go back into my import.
Get it right in there, same idea. Choose your own adventure. Whichever way you like, you'll get that data right in there. Now, once you're done with this, you're going to go ahead and push this to hit finish.
And it's gonna say forecast request is currently being processed, and you'll receive an email when it's when it actually completes. So when it's doing this, it's also running your material requirements planning on top of it. So when I go and refresh this, you're gonna get an email saying that it is completed. Now I know this item has been completed itself. What you'll see on the manufacturing side is gonna be what do I need to manufacture based off that? Boom, boom, boom. I can create a job directly from here. Same thing with purchasing, bada bing. I can create PO for multiple items.
I can also get in here and drill down to my MRP request, which request that I actually use, it's going to show me all the data from that MRP request. That's something that is going to be streamlined. You're using data that's already in the system to be more accurate within not only forecasting but material requirements planning as well. All right. Well, that's going to be your uh forecasting in a nutshell. Now, the next thing I want to touch on is the shop floor manager. So
No, very a lot of people are excited for the enhancements there. So we're gonna go ahead and log in with my favorite production associate, James Hetfield. Let's go, James.
Here's our production front man ready to roll on here. You can see we have more buttons. Okay, right off the bat, more buttons. That means more functionality right off the bat. So you can see on here as well, I can switch it over to Spanish very quickly with native Spanish translation right in here directly into the system. uh And it gives you a native speaker's look at Spanish itself. Time in, timeout is the same on here, routing labor timesheet.
Machines are going to be a little bit different. So the reason why I say it's different is now you do not need a traveler to time into an operation. Like either scan routing or just go into a machine itself. So if I go in here and say look at operations with no machines, I could see my shop floor manager webinar is right here. I could go just click right into it and then scan my AD badge.
Now it's asking me, do I want to time into that operation? Before you had to go time in through the time in function, you had to use a traveler, you had to, had to, had to. Now you are completely digital. No paper required. So very excited about that. Gets us right into that operation. And as you can see, this has been upgraded and updated as well. Beautiful new outlay.
Very well done by our dev team on here. Super easy to manage, especially if you're looking at this in a tablet screen. Very easy to do a two-screen process with your tabs at the bottom and your functionality at the top. All right, so all your normal stuff like internal notes, routing materials. Difference is now I can assign inventory directly into the shop floor manager. You could do it at the job level, or you could do it outside of this, and I'll show you that functionality shortly. You can assign inventory.
Directly in here. Again, allocate and assign. Parcels can be done directly from ShopFloor Manager with the proper permission. So you can create partials from here now. You could do your enter counts from machine counts. You have routing steps that need to be signed off on. So let's say, hey, do we make sure that assembly's been sanitized? Let's do a uh 21 CFR Part 11 compliant electronic signature.
Let's go. Let's get James signing off on that. You'll still have that functionality there. Spec files are here in that new format where you can print, download, or search for them. QMS documents are going to be the same. We just don't have QMS looked up hooked up right now. And it's looking to connect to it. Give it a second here. Fantastic. File attachments are going to be on here. User defined fields. All the all all all the classic Git stuff is still there. Redesigned, updated look, more functionality.
Now when I back out of it, it's gonna ask me, do I want to time out of this routing? Sure, let's go ahead and time out of it too. Makes it super easy. I don't have to go and find my traveler. I don't have to go and sit there and gotta reprint it because I dropped coffee on it. It's all done in the system now. All right, so now you have our materials module here. So this is where you guys will be able to look at anything that's gonna be needed for jobs and create a pick list. So okay, as I'm the inventory associate here, I have all these items I want to take a look at. Some of them transacted, as you can see on here.
Um, but I just maybe want to see maybe some of them have not been transacted yet, like this one right here, this moxicillin. So I'm going print a pick list and go and grab those items. Okay, cool. Job. I need to go pick it up. Part number is right there. Uh, I can go and grab that pick list directly from the system. Print it and get it ready to roll. All right. Your inventory showed on here as well. So you can go in here either print the pick list again.
Or you can go ahead and reconcile on mass amounts of materials instead of going it from job to job. So it makes it super easy for it to move forward there as well. All right. So not only do you have that in the shop for manager, you also have inventory allocation. We've already seen it. So if I go ahead and go into my cutting operation, scan my ID badge.
I don't know if it's gonna let me know. Oh, it will perfect. Now I'm gonna go ahead and scan my lot. As you can see, look, this has been updated as well. And these are the two things I need in this uh area here. As you can see, I need one of each. So I'm gonna go ahead and add one of one of the enclosures. So I can reconcile it. So I reconcile this one. Now I'm gonna reconcile my bottom enclosure. This was pulled from RAW 1885, so I want to make sure I'm pulling the correct lot. So let me go ahead and reconcile it.
Boom, super quick, super easy, one quantity, hit add. Now I have my material reconciled the proper way. Better look on the screen too. This makes a lot more sense than we had it before. Gives you less visibility of what you're trying to do. Yeah, let's time out of there. Why not? All right, so those are the main things that you want to see within the shop for manager itself. So I'm excited for you guys, have your teams play around with it, get familiarized with it.
Reach out to us if you do have any questions. And again, we do have some professional services. So if you do need to implement this and deploy it on on site in your manufacturing facility, we do have bilingual field agents who will come out there, we'll work with your team, figure out positioning, workflows, you know, um everything that's going to make it streamlined for you better better use this. Sometimes with shop floor managers, the best way is to have someone on site to walk you through those pieces.
All right, final big thing I'm going to show you today is our integrations to ShipStation. Even though we have Avalera and Paya, we're running out of time. We only have an hour webinar, so we want to make sure at least show you one integration today, and that's going to be to our partners at ShipStation. So I do have ShipSt open for us right here. If you already do have ShipStation, this will be an easy integration. We could do it today for you. Uh if you don't have ShipStation um and you want to inquire about it, just go to Shipstation.com. You can see some more information about it.
Or reach out to us and we'll walk you through some of the features and functions of it. But for today, I'm gonna go right to my shipping queue. Should have some things going to our friends at Franklin Parts in Gilberts, Illinois, classic. And we're gonna go in here and ship some products.
All right, just like anything else, you'll see that we have inventory already pre-assigned on here. I can always add inventory. I gotta do my shipping boxes, that's gonna be a requirement for this. Oh, before I get started into this, there's a couple of things that are gonna be uh actually updated as far as settings. So one is gonna be your carriers, the other one's gonna be your box types. This is going to integrate directly with ShipStation to get all that information in there. So if I go into my company settings and go to my ERP details.
if you go under your carriers areas now, you'll see that there's a lot more fields. So for an example, UPS ground is a function in ShipStation, so we want to be able to tie them together or uh you know link them up. So you'll see on here we call it UPS ground on the ERP side. Uh we have a ship station carrier called UPS or UPS true if you will. Uh Ship Station shipping service is going to be UPS ground, and this is going to be directly tied to the cost that's going to be in line.
with your shipment itself. All right. Um not only that, box types also has a little bit of an upgrade to it as well, just to make sure we align with our ship station uh integration. Again, UPS package, this could be what kind of UPS package? you know, UPS, we can see that we have DHL, uh Seco, FedEx, you all the big big uh kahunas out there. I keep it on UPS here.
And then you have a ship station package for a UPS package, could just be this package on here. You can see you have the classic UPS shipping collateral here, your express boxes, your express packs, your letters. It's all in there. Super easy to use. All right, I just want to show you that before we get into this piece of it as well. So when I'm doing my box con, it's gonna be like, what am I gonna be using for this? So for this, I'm gonna be using my UPS package. My weights is gonna be here.
What's c what's you have to kind of realize if you are gonna be using ship station, you can only use three different units of measure and they have to be written exactly like they are here. Pounds, ounces, or grams. Nothing else will be acceptable. so we're gonna go pounds on this one. And we have everything that we need to.
Ten units per box on here and we're gonna have one box. We're gonna go ahead and save and close.
All right. Now next thing I need to do is go ahead and assign my shipment. So I could either pick a shipment that I had before or create a new one.
Alright, as you can see on here, once I go, you see a little bit of sync to ship station on there for the shipping cost, but you know everything else looks the same on here except when you go to shipping boxes. I have a create update in ship station. So now I can clear click this box itself, create update and ship station. It automatically happens in the background. It's doing its thing, building your label. We see that's been created for us, and our shipping cost has been synced up and now brought over to us as well.
When I go over the ship station and I look at my orders or shipments, excuse me. Now I see my shipment directly in here for me for Franklin Parts. Here's my label, ready to roll, super easy. Bada bing, bada boom. This is what we talk about when we're trying to be very purposeful with our integrations. We don't want to give you 200 integrations that do the bare minimum. We want to be giving you the ones that make sense, the ones that really provide value to you.
Alright, so that's the sneak peek to Ship Shake. It's easy as that. Super easy to set up, super easy to use, no other really complicated pieces of it. Now, I know I touched on a lot of things today. Uh anything ranging from jobs to shop floor manager to some of our integrations. One other thing I want to touch on is something that we've done recently is our new help center. So you'll notice on the left hand side on here, we added help to the left-hand side because sometimes people forget we have a help center up here.
So we we doubled it, double the fun on the help center situation. What's new in the help center is we've uh well, if you have a pop-up blocker, guess what? You gotta make sure that is disabled for this to work properly. But in here, in our help center, it's been updated and upgraded uh with an AI agent inside. Don't worry, the AI agent is just in the help center uh information, not connected to the ERP. So your data is not gonna be subject to this AI.
We just want make sure we have something there you can go ahead and ask for work instructions, how to function how to add items. Um, how do I enter a PO? Yeah, something as easy as that. You can go in here, or drop it down, drop down a different uh work instruction step by step of what you need, and it's going to break it down in a meaningful manner, whether you're doing a regular purchase order or via the uh MRP functionality itself. So it gives gives you some options there too. All right.
Other than that, if you don't like using the AI, we have our traditional look on here. So if you want to go in the purchasing and look at our typical overviews and previews, you know, flow charts, things like that, they're all going to be readily available right in here in our new, newly redesigned AI-powered help center. All right. That's it for the webinar today, guys. Let me see if I have time for some questions right at the end here. Um um we got a decent amount of people in here. Fantastic. Thank you guys for all uh joining us in here today.
Let's see what we have in QA. Oh my gosh, there's so many questions in here.
I got a good one from Casey on here. Let me go ahead and pop this up on here. Is the shipping step of a contract service required to be completed? Yes, it is. You're gonna want to go ahead and complete that just like any other shipment that's gonna go ahead and close that loop. very, very good question there, Casey. You're always coming up with the good ones. That's why you're my favorites. Um what else we have in here? Is there a way to add a QA inspection in the QMS for rework? Yes, you can absolutely do that, is a good question.
Is there a way to add a QA inspection in the QMS for rework? 100%. This will be done as an in-process inspection on the QMS side. If you do have any questions, my team is well versed on both QMS and ERP, so we can help you out with those questions themselves.
Uh Roman, really good question. Can I import my forecast from a CRM project pipeline? Roman, I would have to kind of see the details there, so reach out to me. Um a security at qtn software dot com. Reach out to me so we could take a look at that together. Uh the devil's in the details with that one. We have to kind of see what that looks like.
Julia, great question from Julia. Can you download documents from ShopFloor to Excel, for example, or versus just print? Yeah, you can download them directly down to your system and open them up in Excel. Um it won't automatically open up in Excel when you download it, but it will download it and then kick it right.
Sean has a good question. Uh does Ship Station support some of the higher level UPS functions like UPS premiere where I associate the sensor to my shipment to monitor temp humidity, et cetera? That's something I would have to look into, Sean. I'll follow up with you on that one. Let me look into it with our Shipstation partners and get back to you on it. So on that as well.
Rick, why is this a great question? Why is your demo so fast but live production takes twenty three seconds to click? I would take a look at your local infrastructure. It matters. You know, we're processing large data sets in here. We don't have a lot of internet that's better than a lot of our companies out there. So one is check your internet speeds, two, look at your IT infrastructure. And then three, just make sure that um you you don't have any firewalls kind of rules holding you back. If you need us to kind of take a look and do like an IT assessment, we can.
just reach out to me and we can kind of look at that uh with our director of IT as well. Really good questions today, guys. I really appreciate everyone's time and attention in our webinar around the release of our new version of 2026. Please take a look in this news feed right here, because it's going to give us an idea when the sandboxes are going to be updated and upgraded for the next uh release. If you remember, we added a release process change on here, which we means we're going to phase in.
sandbox upgrades first so you guys can play around with it. And then uh a few weeks later we're going to get the production sites upgraded as well. So kind of keep that in mind. If you have any questions, please reach out to us to support at QT9software.com. Thank you so much again for joining me today. Hope you guys all have a wonderful day and a wonderful week. We'll see you next time.
Questions From This Session
What Is the Rework Manager in QT9 ERP 2026?
The Rework Manager is a new module that centralizes all rework jobs and rework routings in one place. Rework can be started during manufacturing, from a customer return or directly from an inventory lot. QT9 ERP keeps the original serial and lot numbers tied to the item, so you maintain full traceability without manual workarounds.
How Does QT9 ERP 2026 Improve Contract Service Tracking?
Contract service is now its own module with a contract service queue, closed contract service list and contract service history. Teams can see every operation that has been sent out, is in process or has been returned in one centralized view. Every transaction is tied together, making it easier to manage outside processing and close out jobs.
How Does Potency Tracking Work in QT9 ERP?
Potency values are captured at receiving and connected to the lot through production. Values are calculated outside the system, often from your raw material supplier’s data, and entered when materials are received. That potency data then guides how much material you assign to jobs, which is especially valuable for pharmaceutical, nutraceutical and cannabis manufacturers.
How Does Forecasting Connect to MRP in QT9 ERP 2026?
Forecasting is now integrated with material requirements planning. You can name and save forecasts, then enter items manually, batch edit them or import them from a template. When a forecast is processed, QT9 ERP runs MRP on it, and you can create jobs and purchase orders directly from the results.
What’s New in Shop Floor Manager?
Shop Floor Manager has a redesigned interface built for fewer clicks and faster use on tablets. Operators can time into operations digitally without a paper traveler. Pick lists, inventory allocation and material reconciliation are handled in one centralized area. Shop Floor Manager also includes native Spanish translation, and QT9 offers bilingual field agents for on-site implementation.
Which Integrations Are Available With QT9 ERP 2026?
QT9 ERP 2026 includes integrations with Paya for credit card processing, Avalara for tax management and ShipStation for shipping management. QT9 also offers a free and open API, so you can connect additional systems your business relies on.
Key Takeaways
Presenters
See QT9 ERP in Action
Discover how QT9 ERP 2026 helps manufacturers manage rework, contract service, forecasting and shop floor execution with full traceability in one connected ERP platform.
Request an ERP Demo →Explore QT9 ERP in Action
Take a self-guided tour of QT9 ERP and see how manufacturers manage production, inventory, purchasing, job scheduling, traceability and compliance from one integrated platform.
Launch Interactive Tour →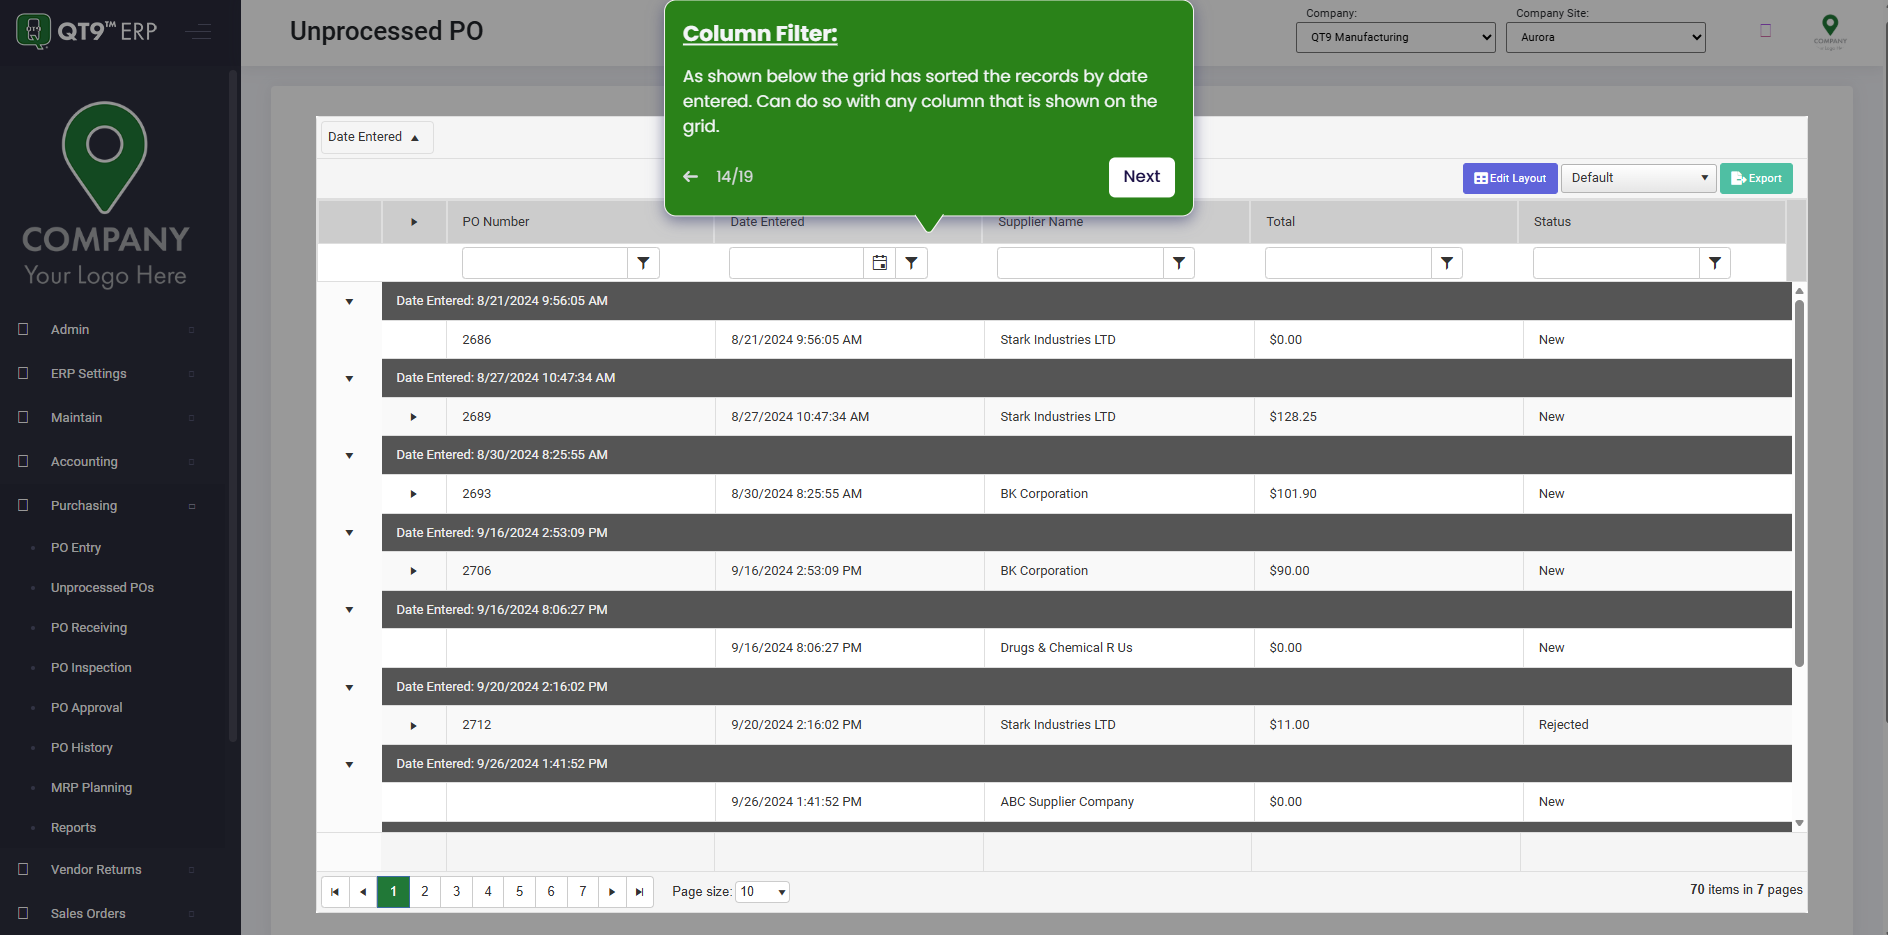
Simplify Quality, Compliance and Operations
Start a Trial
Try QT9 free — no credit card required.
Start Free→
Schedule a Demo
See QT9 live with one of our product experts.
Book a Time →
Get a Quote
Get custom pricing tailored to your team size.
Get Pricing →