CAPA Software Demo: Corrective & Preventive Actions in QT9 QMS
February 20, 2024
Full Transcript
Good morning, everyone. We are going to go ahead and get started here. So first and foremost, welcome to the webinar. We're so glad you guys are joining with us today. During today's session, we are going to be going through the corrective action module. And we're also going to be discussing how to get the best results from the system. Now, before we get started, I do want to go over some of the basic webinar tools to make sure
that you guys know how to utilize the tools here inside of the webinar. First and foremost, I do want to point out the orange arrow on the vertical webinar toolbar. This arrow will either expand or collapse the toolbar view. Now, this is important because at the bottom, you do have your question area. And of course, this is where you can ask questions during the presentation. We do have staff on hand to answer any questions that you guys may encounter during the session.
The other thing that we do want to talk about here too is a little bit about the webinar series itself. Now we're really glad you guys joined us today. This is part of our free webinars that we offer to our clients to provide our users with the best features, functions, and tips to utilize our software to its greatest potential. Now during the course of today's session, we are going to have a wide variety of users in attendance. So just to be respectful of everybody's time, we do want to keep
all the questions that are being asked in the question area to just the topic at hand. If you guys have additional questions, you can always feel free to reach out to support at qt9software.com. And of course, if after the session you do need some additional assistance, you can always request a one-on-one session. Again, you can email support at qt9software.com and they can get you in contact with one of our trainers.
The last thing we have here is at the end of today's session, there will be a brief survey. If you guys could fill that out, that gives us some great feedback and it really helps us make sure that the content that we're providing is hitting the mark for you as a customer. It's only a few questions, so any feedback you guys can give us would be fantastic.
Alright, so let's kick this off and to start things off here, let's start with an overview of what's available in the QT9 QMS APA module.
Now, we can utilize the QT9 QMS module to automate our CAPA process. Now, we can manage corrective actions, we can connect and collaborate both with your colleagues and your suppliers. We also have a user-friendly reporting module in QT9, as well as our new business intelligence tool, which allows you to review your data at a high level as dashboards and as reports.
Now in terms of what we're going to cover today, a good outline would look something like this. So we're going to be focusing on what is a a Kappa and its relevance in QMS. We're going to discuss correction versus corrective action versus preventative action. We're going to discuss Kappa sources. So what modules integrate with Kappa module. We are going to discuss the Kappa workflow root cause analysis. How using tasks.
to manage different stages of the CAPA can be very useful. How to involve the pliers in the CAPA process, using custom fields in the CAPA module, and presenting CAPAs to external auditors, as well as CAPA reporting and the business intelligence tool.
Now, to get started, let's start with a base level definition of CAPA, corrective action, preventative action. The purpose of a CAPA is to collect information, analyze information, identify and investigate product and quality problems, and take appropriate and effective corrective action or corrective and or preventative action to prevent their recurrence. Now there's a lot in that single statement, of course.
The QT9 Kappa module can help you do all of the required items such as collecting and analyzing the information like we discussed, document investigation, determining and implementing actions taken, as well as the verification and validation activities that are discussed here on the slide. Now, the other key thing that our system does is it allows for communication and collaboration with colleagues within your organization, as well as suppliers if necessary.
Now the CAPA module that we have in QT9 can help address every one of those concerns and one of those elements as part of the CAPA definition.
So let's talk a little bit further. What do the different terms correction, prevention and CAPA really mean?
So it's important to know these definitions. So what is a correction? Sometimes it's called a quick fix, but essentially it's the action to eliminate the detected nonconformity at its core. All right, at its core, a correction is fixing the issue that was found.
We also have corrective action. This is the actual action that you've taken to eliminate the cause of the nonconformity and to prevent a recurrence of the same issue with the corrective action. As part of this, of course, you do have the root cause element. And you will need to do an investigation on the root cause so you can establish what actions need to be taken. Now, obviously, this will help you to prevent recurrence in the future.
The other item we have is preventative action. So focusing on preventing occurrence. All right. A purely preventative action is prevention or preventing a problem from occurring versus a corrective action, which looks to prevent the problem from reoccurring. All right. So those are two important distinctions that we need to discuss. Now we've defined some of the core elements of CAPA, but let's talk about
some of the sources or some of the modules where corrective actions can be generated from.
So the Kappa sources tab here, and in this area, this kind of gives us a nice breakdown of all the different modules that integrate directly to Kappa. Now there are many sources of Kappa as a reason to create a corrective action inside of QT9 QMS. Now we have several modules where Kappa's can be created from different issues or sources. Let's identify those. First and foremost is the deviation module. Of course, if you have a temporary change,
A corrective action could be a natural extension of that temporary change or vice versa. All right, so that you can create a corrective action from a deviation module. You also have the ability to create a corrective action or a preventative action directly from an internal audit for any internal audit nonconformities. So if you have audit findings from that finding, you can determine that either a corrective action or a preventative action.
are necessary. You actually have the ability to create a corrective action from the non-conforming product module as well. It's one thing to identify if there is a one-off non-conforming product, but if this has come up in the past or this is a serious enough issue, that non-conforming product may need a corrective action created from it. So we give you the capability to do so.
Supplier issues are another item. So supplier issues are common sources of corrective action. And we're going to be looking in the supplier portal a little bit later on in the webinar. But essentially, a supplier can be assigned to a corrective action or a non-conforming product record. And they can respond through that supplier portal.
Customer complaints are another one. especially for our MedDevice clients, anyone with ISO 13485, there's a high likelihood that a high volume of your corrective actions, or CAPAs, are going to be created from the customer feedback module. And from a feedback record, you can create a corrective action or a non-conforming product record.
Management review is another one in general because that has a link to the CAPA module. Now this is useful because during a management review, if there is an issue that you determine and that issue escalates, it could turn into a formal corrective action. You can start that process from an MRM issue. Inspection module is also another one where corrective actions or non-conforming product records can be created. Of course, ⁓
Depending on the way your inspection plans are laid out, you could create multiple corrective actions or multiple non-conforming products from one inspection.
Risk are also considered sources of corrective actions, right? Because from a risk assessment, you could create a corrective action, and from a corrective action, you can create a risk assessment. So just pointing out, those are two modules that have a lot of interconnectivity. The other item we have here, of course, is safety incidents. So accidents and near misses can be another source of corrective actions that you guys identify. And you can create corrective actions directly from that safety incident module.
Now it's important to note that when you create a corrective action from, let's say, a non-conforming product record, that link is permanent. So when we talk about a hot link, what we really mean is that there is a link between the two. They do not continuously share data back and forth, but there is a permanent link between the two. So very important to keep in mind.
So before we get into a practical example of what is available inside of a corrective action inside of our system, let's talk about the workflow.
Now this diagram here lays out the workflow in a nice flowchart setup. So realistically, you can start with that new corrective action ⁓ or Kappa. So you just create it from scratch. And then after you start the process, it's going to ask you to enter your basic details and save. Of course, that's going to include your description. That could be material info. ⁓ That's the basic info of, you know, basic information for this particular issue.
And of course, from there, we're going to flow down to the root cause. So we've identified the problem, or we're going to identify why this occurred. So that's where our root cause analysis with the five why comes in. We can take that a step further by going to the analysis or corrective preventative action area as well. So that gets handled under the analysis area. Now, since we're identifying the problem and we're identifying the root cause and our analysis of it, chances are we're going to be ready to create tasks fairly quickly.
So those tasks are important because with the task, those are going to distill all of the information that we've had into actionable items, things that we can actually do to address this particular issue. Now, once all of the analysis and all of the tasks have been complete, of course, we can flow down to the approval process, where, of course, you have an approver who will be able to review the actions that have been taken, the task, and they can decide if this is approved.
and ready to move forward to the verification step. Do keep in mind, approvers can reject back to the responsible party phase if they find issues with any of the basic information that's been provided. But once approval happens, it'll flow back, or flow forward to verification. Now, with the verify, you do have the ability to verify right when it hits the verification process, or
more likely people tend to use Verify later. Now you can assign another colleague in the organization to that verification. So if you do want to set it 30 days in advance, you absolutely can. So you do have that capability. But once the final verification takes place, you will be able to close or complete the corrective action.
All right, so this workflow gives us a nice, easy overview to see what is available. But let's go ahead and let's provide a practical example of how this operates. So I'm gonna grab the site here.
And here we have our QT9 QMS. Now, if we do want to create a corrective action, I can do so by going up here to the ISO functions, go into corrective actions, and I can either go into the grid view by clicking on corrective actions or create a new corrective action by clicking here on the slide out. In my case here, I am going to go into the corrective action area. And of course, this grid view is set up for me.
Now, I do have the ability to add or customize this grid by dragging columns where I want or right clicking in the black column header and adding columns as I choose. But in my case here, I'm to go ahead and create a new corrective action. So can click here on new corrective action. And this is going to bring us into the corrective action form. Now, a couple of things I do want to point out in here.
there are some drop down that are populated by you before you utilize the corrective action and those drop down are your corrective action type your problem type your priority and your disposition.
Now you will build these during your implementation process, but these can be modified under the manage. Maintain under ISO actions and you can see the drop down titles here. You can go into each one of those areas and modify the drop downs as needed. This area is limited to your global admins or site admins with the data admin user designation as well. But corrective action type.
This is the primary level of categorization for a corrective action. Problem type is optional. However, it is the secondary level of categorization. So I would recommend utilizing it. This will make your life a lot easier at the end of year to really see what has gone on with your corrective actions throughout this time frame.
And also it's important to note that problem type is essentially the only level of categorization available for a non-conforming product record.
We also need a priority. So remember, priority is going to drive or define the due dates. So you are not restricted to using low, medium, high. Yours could be level one, level two, level three. You could use critical, non-critical. You guys decide your priorities and from that priority, how many days until that record is due.
The other thing we have here is the responsible party. Now this is the individual that we are actually assigning to handle this record and they're going to manage it up to the point of approval.
We do have the ability to identify if customers or suppliers need to be involved. If so, we can select them from the dropdown here. And if necessary, I can assign to a supplier as well. I also need in here a description. So what actually occurred? So in this case, know, auditor located out of revision documents on shop floor.
All right, so can enter that information here. Now, once I have the core data here, I could go ahead and I can save. Once I save, this is going to send an email notification to that responsible party, letting them know that they have something to work on.
All right, and even if I am not the responsible party, I do have the ability to assign that as needed. So I'm gonna give this a second cycle here.
And now this corrective action has been created. Now I know this has been done correctly because now I have a record number at the top. The status is open. Now there are other records that can be created from a corrective action. We kind of discussed this. I can create a risk assessment from here or I can create a deviation from here. Again, these are both potential outcomes or natural outcomes of a corrective action depending on severity.
All right, so if I create a record from here, it's as simple as clicking required in this case. I can then enter the required fields for the risk assessment.
And once I have the correct information, I can create that risk assessment and that will create a linked record or a linked risk assessment. Remember, they're linked, but they still have their own, they're independent in that they can be open and closed independently of each other.
So let's quickly talk on the material info and additional data tab. These are optional, but these have a ton of great information in here that you may want to track. Because with a corrective action, of course, it doesn't have to be material focused. It could be a process problem. So you don't have to designate a material info if you don't want to for corrective action. But I can search from the products here. If I do want to capture any of the information that you see present here, I certainly can.
You do have the ability to capture credit and cost details, and you have the ability to define disposition. All right, so we have a lot of great fields and a lot of great information that you can capture right here. Of course, you also have additional data. So again, additional fields for you to capture, and you do have the ability to reference a piece of equipment from the preventative maintenance area or a gauge from your calibration area.
Now the next thing we come to here is root cause. So 5y is our default. Now if you use other methods, we understand this area can't be modified. But if you do want to use a fishbone diagram or something like that, you could build it into the user defined fields. Or if you've got a diagram that you like, you could just fill it out and upload it as a related file.
But in order for you to submit the record, must be something in at least Y number one. Y two through five are optional.
The other thing that we do need to discuss here, of course, is user defined fields. Now we're going to talk about these in more detail later on in the session, but these are custom fields that you build to track information that we don't directly handle inside of our QT9 setup. User defined field is where you have the ability to customize the module to suit your needs. Supplier response is also populated via supplier corrective action user defined fields. Again,
We're going to talk about this a little bit later on in the session as well.
The next tab we have here is the Analysis tab. Now you can use all three fields or you can use a single field in here. It's up to your discretion. A lot of our customers prefer to use all three, including the immediate containment action, the permanent corrective action, the preventative action, but it is not a requirement.
All right, we kind of talked about supplier response already, but task. So we're gonna take a deep dive into task a little bit later on, but essentially you can create as many tasks as you like to any user that has access to the corrective action module. So of course, if I create a task, I can assign as many of these as I need to as many users.
We have to identify an approver, all right? Because users, essentially anybody that is a global admin or a site admin will appear under here, as well as those with the ISO approver user designation. But you guys define at the global level what your minimum number of approvers needs to be. But this is us identifying who's going to review this and approve.
Now you do have verification in here. ⁓ This typically gets used during the verification phase, but if you have something to add to the verification process, you know, while this is in an open status, you absolutely could.
All right, and the last two things we have here are related files. We can upload as many related files as we want here. So any type of supporting documentation, as long as each file is under 150 megabytes and is a non-executable file. Other than that, we're pretty wide open what you add there. And of course, we've got the timeline. So anytime we make any edits or changes within this record, the timeline is going to capture it.
Now at this point, is all you really. These are all the elements of a corrective action, and as you can see, we're pretty thorough with what we have. One other thing I do want to point out on the grid is that you do have the ability to change the filter here, because I'm seeing what's open for me. But if I want to see all open corrective actions across the entire enterprise, I can change the filter here to open. So depending on what I need, I can change the view.
Alright, so now that we know or have a brief idea of what goes into a corrective action, I want to move back to the presentation because one of the things we need to address is root cause analysis.
Alright, so let's talk about root cause analysis. So looking at root cause analysis, this is the process of discovering the root cause of the problems in order to find appropriate solutions. Now, essentially, it's a systemic reason why the nonconforming nonconformance occurred and if addressed within the corrective action, preventing recurrence. That's really what we're looking for. Now.
Here are some tips when you're formulating your root cause. So the root cause cannot be a restatement of the nonconformance. All right, pretty straightforward on that. The root cause cannot be a direct cause. So as an example, there's a layoff. You changed locations, new equipment being added. Was the planning appropriate for these node events? So root cause cannot be human error.
Was the training ineffective or was the management system documentation unclear with respect to the requirements? So essentially, we owning when training is not meeting the proper level of criteria or the documents aren't meeting the required criteria? Lastly, the root cause cannot be a lack of understanding. Was the training ineffective? So again, going back to training.
Now these tips are especially useful for preparing nonconformity responses for third party or external auditors, right? So 5Y is one method of root cause investigation. That's just what we use as a company right now. This may change in the future, but 5Ys are what we're currently using. Now of course we know that we have clients that use fishbone or the Ishikawa diagram. 6M is, is not method. Everybody has
their own different method that they prefer to use. So if you guys do want to utilize that, of course, that's where user defined fields come in or related related files. So we know that it's not one size fits all. All right. But one thing I do want to talk about here is let's talk about an example of five why inside of our system. So I'm going to grab an existing corrective action here from our from our system tool.
and this one has the root cause already identified.
All right, so here's a practical example of a root cause. All right, so we've got all five Ys populated. Again, the system doesn't require all five and not every issue requires all five, but we have to have something in Y number one. Now, under the description here, we're stating the incorrect item shipped to the customer. All right, so that's a pretty general, pretty easy statement. Now, if we go to the root cause, I can go in here and of course, I can identify the Y number one.
The wrong item was pulled from inventory. Okay, that's a fair assessment, but why? So if we take it to the next why, that item was pulled from inventory that was mislabeled. All right, so we know that the wrong item was pulled from inventory and we know that it was mislabeled. So let's figure out, let's take it a step further. again, why? So the supplier mislabeled the item before shipping it to us. So now we know that this is from our supplier.
All right, so this automatically tells me this is going to become a supplier corrective action. All right, and of course, the employee of our supplier used a pre-printed label, but they were incorrect. All right, and then again for Y number five, the labels are not well identified at the printing station and it's easy to pick up the wrong label. All right, so this is us just working through the five Ys. These then getting to the root cause of the actual issue.
So now we know it's because labels are not identified well and they're not stored well at the printing station, making it easy to have a failure.
Alright, so we know now that they process control issue. So now that we've identified the root cause, we've got the description. And maybe we've done our analysis at this point too. But now that we know what the problem is, we can now address it. This is where we can really move into past.
because we now have an actionable issue that we can create tasks to address. So let's do a quick changeover. Let's go back to our presentation here.
So the task feature in QT9 is extremely useful and the majority of modules in the system have the ability to create tasks. One common question that we get across the board for a lot of tasks is can tasks be created independent of other records? They can't. A task must be tied to a record. So for example, you have to have a corrective action to create a task for it.
You have to have a nonconforming product to tie a task to. In general, that's what we're looking at. All right, so we must tie a task to a record. Now the nice thing about a task is this allows actions to be put into concrete actions that need to be taken with details, with a assigned to it as the responsible person, and a defined due date.
So being able to assign other colleagues ⁓ the ability to work on task is useful because all records in QT9 have a primary owner. So that's typically the responsible party. The only other person besides the responsible party who can touch that record are global admins. All right, so it's important to realize that if we need to involve other individuals from our organization into
a corrective action or to any other part of the system, then tasks are very important component.
Now, one other thing about tasks that's really interesting is that you can view all tasks for the entire system under the task area. So if you do navigate to the projects and to the task tab, when you go in there, you can change the filter to see open task, and you can see every open task that is out there across the entire enterprise.
All right, now there is one feature with tasks that's really, and is often overlooked, and that's the ability to prioritize your task. Now, inside of a task, you have the capability to change the priority level. Now, while the ability to assign a priority to tasks can simply be used to prioritize or define order, it can also be used to categorize the task and linking stages of the Kappa.
to the particular task, as illustrated in the table. So for priority one, we have short-term containment corrections. So in this case, if I want, you know, in this case, that correlates to those elements. I could change the priority to two for root cause investigation and the analysis of different actions. For three, of course, I can talk about the corrective action, the long-term action, what's the preventative action.
So I can prioritize as needed. The last one I could technically do is verification activities. Now do keep in mind that tasks can only be created during or while the record is in an open status.
Once it has been submitted for approval, additional tasks cannot be generated. Also, it's important to note that tasks must be in a completed status before a record can move to the verification of effectiveness. So do keep that in mind when we are talking about tasks. Now, we've talked about some of the basics here. Let's see what a task looks like within the system.
All right, so under the task area here, this is where I can actually begin creating tasks. Because like I said, I have my root cause identified. So I can go ahead and I'm ready to start creating these tasks. To do so, I'm going to go ahead, click here on the Add Task button. Now when I was talking about priority, I am talking about this area over here. So I can change the priority here as needed.
Do keep in mind one is the lowest priority. If you try to go below that, the system will give you a little error. So priority one is the first. So in my case, by our example, I'm going to classify our immediate containment action.
for this particular problem. So in this case, I'm gonna set a target date for completion. So I want this done no later than the 20 seconds. And I need to establish a responsible party. So remember, the only people that will show up on this dropdown here, of course, are your ISO action ⁓ users, site admins, global admins. The other thing I need is a description. So in this case, what do I need them to do? So in this case, ⁓
Alright, so this case here I've got the basic description of what I want them to do. Once I have that title, that target date, the responsible party in the description, I can go ahead and I can save.
Now, once I save, that is an action that will generate an email notification to that individual, letting them know that they have a task to work on. Additionally, they'll get a notice under their to-do list here at the top of the screen under the task area. Now, I did mention earlier under the projects and task area, I can go here to task.
and this will bring me into the task itself. Now, when I am ready to move or ready to work on this task, I have to sign into it, and of course, I can start the task. Now, you must hit that Start Task button. Once you do, the only requirement, of course, is to put something in the action taken field and complete the task. You do have the ability to add notes and files here, but just pointing out, you must first start the task and at minimum you need an
your action taken. Everything else here, notes, files, are optional. But I do want to point out that if you do want to see a full run through of the task, I would recommend attending a session through QT9 University. We will go through the task process during those sessions.
But you can see now how we can engage our internal stakeholders with a task. All right, so now that we know how to get them involved, how do we involve our external stakeholders? So in this case, our vendor, because in our example here, we know that the stem from an issue with the supplier. So how do we get suppliers involved in a corrective action?
Now, we're going to come back to the screen here in a second. I do want to go ahead and move into the screen here talking about supplier corrective actions. Now, one key thing to keep in mind is that suppliers may interact directly with your corrective action or CAPA via the supplier portal. Now, this is a free portal that is included in your licensing and all QT9 customers have access to utilize.
It's license free, which means that you don't have to consider how many suppliers you're using it at one time. There is no limit. So if you need 50 suppliers in there at a time, responding to corrective actions, things like that, you absolutely have the capability to have them in there. Now, I do want to keep it. I do want you guys to keep in mind that a supplier can be assigned a corrective action or a nonconforming product. All right. Those are things that are available to them in.
the portal.
All right, now the other thing that they can do in that portal as well is they can review evaluations that have been done, so supplier evals that you've done for them, or they can respond to surveys. So we'll talk about that in more detail here in a moment. But you may be wondering, how do I set up a supplier in the supplier portal?
So essentially, all we need to do is assign an existing supplier with a username and a password. They also need to have a main contact and the email address defined. Once those elements are present, you can use the send account info from the supplier profile. Now this is going to send them the URL to the supplier portal, and they're going to get their login details in plain text.
All right, so we kind of talked about supplier, what they can do in that portal and that they can respond to corrective actions, nonconformances, and again, they can do evaluations and they can respond to surveys. Now, when we talk about surveys, a common question that comes up is what do we mean by a survey? You're trying to get information from them. So this could be, we've seen practical uses for this being used to onboard new suppliers or to recertify existing suppliers.
These are common examples we see of usage of the supplier portal. The other key thing is that this portal is very user friendly. It's very simple to use and suppliers also have access to a help file specific to the supplier portal. Now one other neat thing that happens with having your supplier portal turned on and having suppliers that are able to access it is if you have the add on document portal, if
you provide that link or that URL for the doc portal to your supplier. And if you've assigned your supplier documents and the supplier record, they can view those documents through the document portal using the same credentials as their supplier portal. So very, very helpful. So now that we know the capabilities of the supplier portal, let's discuss the actual workflow.
Alright, so when we move into the workflow here, how does this actually work? So suppliers are linked to a CAPA and the corrective action module under the assigned supplier. Now they are notified directly from the corrective action module. So there is that button to notify supplier. Now I'm going to show you where that is when we go to the practical demonstration. But suppliers will receive an email from QT9 asking them to log in and to respond to this corrective action.
Now, they can log into their portal to access the assigned record. Once there, they're going to see the areas that they need to fill out highlighted yellow. So we make it very clear what they need to answer and what they need to provide. Now remember, you define the supplier response. So I'm gonna show you that in the system before we go to the supplier portal. But remember, the supplier car UDS, that is the field where you decide what questions they need to answer
in the supplier portal.
One other key element for a corrective action or a non-conforming product record in the supplier portal is that they can respond with documents. So if they've got documentation, they have their own root cause. Anything that they deem relevant, of course, they could upload as a file. Now, once the supplier submits the corrective action, the responsible party is going to get notified and they can log in to either accept or reject the corrective action.
So this essentially replaces your existing supplier corrective action system or SCAR system. And now you can do all of it here inside of QT9. So let's see what this looks like in practice.
So first things first, we're in our corrective action here. But what I need to do is identify the supplier. And in this case, I want to assign it to the supplier. And when I'm ready, I can then notify the supplier. When I hit that notify supplier button, that is that action that will generate the email notification that will go directly to them. Now, before we get into the supplier portal,
I do want to identify the supplier response. So this is the field that's going to get answered by the supplier in the supplier portal. And remember, you define what's here. So you can define how many questions are answered or how many questions must be answered. This is up to your discretion.
All right, so of course, let's go ahead and let's see what this looks like from the supplier view. So this is the supplier portal. Now here they are going to have to log in with their login name and password. They're also going to put in their name and their email address. Once they do that, they can log in.
Now, this is the home screen of the supplier portal. Now, of course, in here, they have the ability to see corrective actions, non-conforming products. They can view evaluations, or they can view surveys. So, in this case here, I can go to the corrective action. I can view the corrective action. And I can see that I have two that are assigned to this particular supplier. But I'm going to go over here to the right and click here on the View Edit Corrective Action.
Now, in here, as I mentioned, everything that I need to do is highlighted yellow. So this is a supplier response. So in this case, supplier root cause, labeling issue, our action taken, let's say they updated, we updated our label storage in shipping area.
So just putting in the part number here that was incorrect. So in this case, I've got that information here. The other thing I can do is I can upload supplier files. So let's say that in my case, I've got a ⁓ root cause analysis that I want to include. All I can choose my file here. I can search my computer, locate that document, and I can save.
Now, once I have filled out the supplier response and once I have the supplier files, technically, all I need to do is go over here to the top and submit. Once I submit, that is going to, of course, notify the responsible party that they have something to work on. So this has now been submitted. And I can see, in this case here,
I've done my part so OK in this case you can see here on the timeline that that supply response has been submitted. So if I go back into this area here or back into the into the main system and I refresh my screen.
When I go back in here, I can actually see the supplier response is now present. And I also have the ability here to see the related files. So I can see what the supplier uploaded. I can see the supplier response. All right, so this is an easy way for them to actually work with us directly through the system.
All right, so very, very helpful, very, very useful.
All right, so now that we know how to involve our suppliers and what they're in looks like, one other key element that we need to address is how to customize the CAPMA module to suit your organizational needs. Now we do that through the usage of user-defined fields. Now we're gonna stay here on the site to walk through how the UDFs are built, and we're gonna talk about how to actually set and how to use your user-defined fields fully to your advantage.
So let's go up here to the global menu, which again is limited to just your global admins. We're to go to settings.
And we're going to go to UDF. Now under UDF, again, this is where all of these areas have unique user defined fields. These can be built to be whatever you need them to be. And each module can have their own unique user defined fields. The two that we're going to focus on today are corrective action and supplier corrective action. So in this case with corrective actions, these corrective action questions, you are going to be blank by default.
But you get the opportunity to add as many sections as you like, and you get to customize the header on each section. So we have, you know, looking at what we have established here, we have background information for one, root cause analysis for two, and additional for three.
Now under each section, I have the ability to add as many user defined field questions as I need to. So I do want to point out if I do add a user defined field here, when I click on this, the system is going to give me an option here. So I can define the type or response type of the question. And there are four response types. You've got open, closed, multi, and numeric.
So open is going to provide an open text field where somebody can respond in more of a paragraph or explanation response. Closed means that we are going to pre-define responses and the user can select one of those responses. Multi means that we are going to pre-define multiple responses and they could select one or many of those responses. And numeric is a text field that only accepts numbers. So we can type in the question, how they can respond.
We also have the ability to make a question required. Now, if you check that required field, what you're telling the system is that any time a corrective action is created, this question must be answered before it can be submitted for approval. So, do keep that in mind. I always tell people to be mindful of what you make required. One other key thing I want to point out here is the display UDS in the module grids. So, if this is checked,
What this means is that this information that you capture here and the user defined field can be pulled into the grid view. Now one disclaimer I do want to give we give you the ability to toggle these on or off specifically because if you have a high volume of data in your user defined fields, it will slow down performance. All right, because if you're bringing in a ton of data, this is going to naturally slow since you're bringing in so much is going to naturally slow down.
the loading of the data grid. So if you don't have a lot of UDS, but you have stuff that's useful, absolutely turn on the display. All right, but just pointing out, you do want to be mindful of that.
All right, and again, supplier corrective action follows the same process. I can build as many sections with as many questions and make them required as I need to. And this is what's going to be answered by our suppliers.
All right, so that's a good deep dive on user defined fields. One final topic for today's presentation is going to be trending and reporting your data. Now, you do have the ability to generate reports here inside the system. So if I do go over to the reporting tab, and in my case for today's example, we're using corrective action reports. I do have the ability to click into this area. And of course, we have some canned report types in here.
So if I do want to see an open corrective actions, an overdue report, ⁓ a line graph, bar charts, statistical reports, these are all things that I can generate. So in my case here, if I wanted to pull a statistical report, this is, and I could select statistical report and I could add additional items here. So if I wanted to see based off a specific car type, I could say that car type equals audit issue or customer complaint.
or inspection issue. Any of those things I could pull in here and I could add it to the conditions. But in my case here, I just want to pull the statistical report to give you an example. So I'm going to generate this report here.
All right, and this is what it's going to spit out. So in this case, it's looking at count or percentage of corrective action types. I can see the problem types broken down in here, who the responsible party is, the average time approved by approver. So I can see the total corrective actions, still open, submitted, awaiting verification status, and closed. I also get some other stats here, entered to submitted, submitted to approved, and other stats.
So this reporting just comes baked into the system. This isn't anything that you have to purchase additionally.
All right, so that is one element here. Now the other thing of course is looking at the grid views themselves because pulling reports from here is fantastic. But a lot of people overlook what they can do just in the grid because with that grid view, I can add data in here, including user defined fields as needed. If I scroll down here, I could see all the UDFs are here.
but I can add all of those here to my field and I can export this grid at any point in time. So this is a great way to get high level data for your corrective actions. So without ever having to pull a report, the grid view itself is very, very effective. And it's one that tends to get overlooked for reporting. The other option that we really have is our BI tool. Now, if you haven't seen the BI tool before,
It is a new tool that was available as a version 15 and it allows you the ability to build custom dashboards. So I'm actually logged into this BI tool already and I'm on my corrective action dashboards. So I've got mine set up with corrective action type by supplier. So in this case for each supplier here, I can see the types of corrective action, the corrective action types that are assigned to them.
I can also see corrective action by customer. Now, one of the nice things here is you notice I can click into this and call out certain data. On other reports, I can actually click into it and I can drill down depending on the nature of the report or of the dashboard itself. So the BI tool is a very potent tool to really build and to expand on your reporting capability here inside of the system.
The other benefit that the BI tool offers, if you guys are looking for custom reports, through the BI tool, you do have the ability to purchase custom reports, and we can set those up for you. So just pointing out, these tools, coupled with the reporting that's available inside RQMS, gives you guys a fantastic set of data that you guys can view and you guys can review your data in great detail.
Now, that is all the core information I had to cover with you guys today. I do want to take a second here to see if we have any outstanding questions.
All right, I don't see any at this point. It looks like everybody is handled here. ⁓ One thing I did want to point out, we did have a question about hard copy printouts. These dashboards can be exported with a click of a button. So if I do want to export something here, I do have the ability to go in here and I can export the image very simply. So if I do want to export it, I can export the PDF. I could export this directly to a
directly to a PowerPoint. This gives me a ton of opportunities.
All right, I'm just seeing if there's anything else here.
All right, it looks like we've addressed most of the questions here. If your question did not get immediately handled, you will get a follow up email from us to get that taken care of. But again, thank you guys so much for attending our session today. We're so glad you guys joined in. Do remember there's a brief survey at the end of the session. That just helps us really improve our process. So feel free to fill that information out. But again, thank you guys so much for attending. Have a wonderful day. We'll see you guys soon. Thank you very much.
Questions From This Session
Can a corrective action create other records in QT9 QMS?
Yes. A corrective action can be linked to other quality records, including risk assessments and deviations. These records remain independent, but QT9 maintains traceability between them so you can easily navigate between related quality events and actions.
How do suppliers participate in corrective actions?
Suppliers can be assigned directly to corrective actions through the Supplier Portal. They receive a notification, log into the portal, complete the supplier response fields you've configured, upload supporting documents if necessary and submit their response back through QT9 for review.
Can tasks be created independently from a corrective action?
No. Tasks must be associated with a record in QT9 QMS. In the CAPA process, tasks are commonly used to assign investigations, containment activities, corrective actions and verification activities to specific individuals while keeping everything linked to the original corrective action.
Can a supplier upload supporting documents when responding to a corrective action?
Yes. Suppliers can upload supporting documentation directly through the Supplier Portal. This might include root cause investigations, corrective action plans, evidence of implementation or any other files needed to support their response.
What reporting options are available for CAPA management?
QT9 QMS includes built-in reports for corrective actions, problem types, approval metrics, status tracking, and CAPA trends. Organizations can also use the Business Intelligence module to create dashboards, visualizations, scorecards and custom reports that provide deeper insights into CAPA performance and compliance trends.
Key Takeaways
Presenters
See QT9 QMS in Action
Learn how QT9 QMS helps manufacturers manage supplier audits, corrective actions, and supplier compliance from one centralized platform.
Request a Demo →Explore QT9 QMS in Action
Take a self-guided tour of QT9 QMS and see how organizations manage audits, supplier quality, CAPAs, training, document control and compliance from a single platform.
Launch Interactive Tour →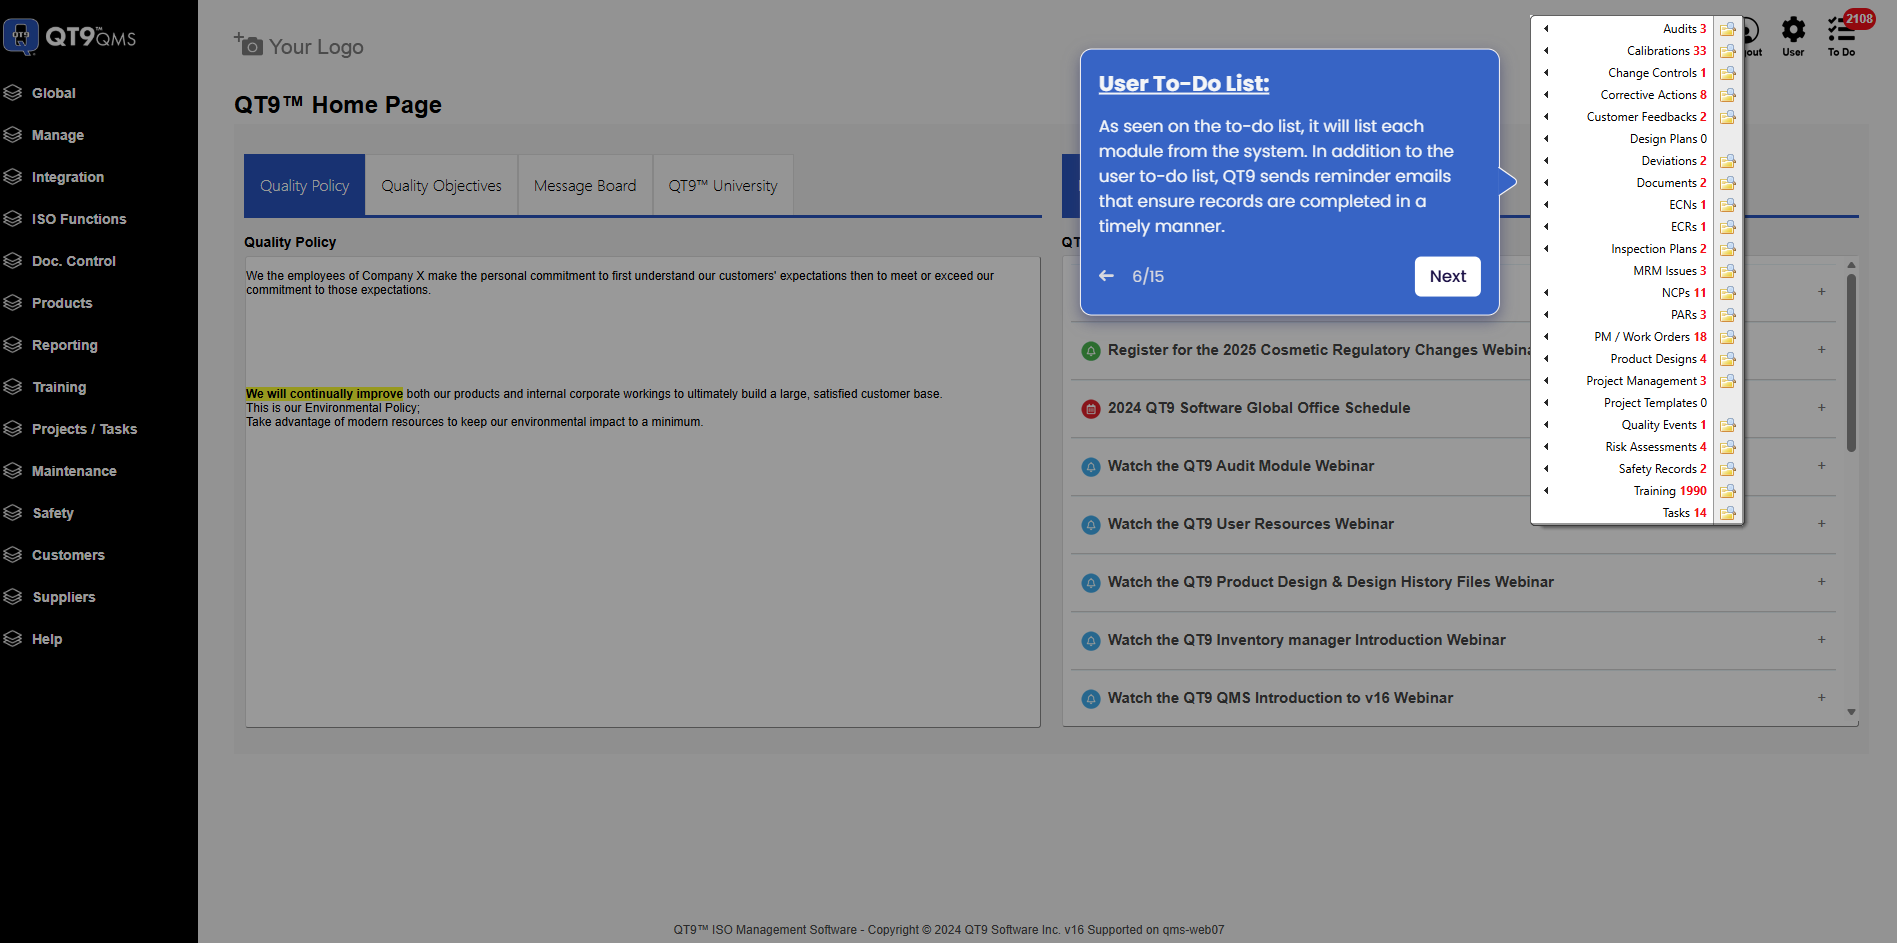
Simplify Quality, Compliance and Operations
Start a Trial
Try QT9 free — no credit card required.
Start Free→
Schedule a Demo
See QT9 live with one of our product experts.
Book a Time →
Get a Quote
Get custom pricing tailored to your team size.
Get Pricing →